Category: Uncategorized

  • Story Ideas

    Story Ideas

    Not sure where to find good story ideas? This post is for you!

    what impact are you trying to make?

    Stories should inform your audience so they can make better decisions. Stories should raise awareness and empathy. How will you use your platform?

    Instead of only focusing on problems, look for opportunities to showcase solutions to empower your audience to make their communities better. Solutions journalism takes a basic story one step further by showing how people are addressing common problems. This requires understanding context and patterns. Most stories are part of a larger issue.

    Examples

    The refugee crisis can seem so big and overwhelming. Instead of desensitizing your audience by only showing huge refugee camps, you can humanize refugees by interviewing one of the kids integrating into a new culture by riding bikes with them. Show them as people who are just like you and me.

    Here’s a great example of how Yusuf Omar showcased people cleaning up their community. These positive stories perform way better online because people are more likely to share uplifting stories than depressing ones. Focus on solutions.

    Child labor is a huge problem that often goes uncovered. Here’s how he turned a problem into a solution. He showcased a shelter that helps former child laborers learn English and self defense:

    Instead of only reporting on homelessness, teach your audience about resources. Where are the local shelters? Did you know there are many parking lots where homeless people can sleep safely in their cars? How can your audience donate money, clothing, or time?

    USE TWITTER LIST TO SAVE TIME

    I use Twitter lists and Tweetdeck all the time to find story ideas more efficiently. The great thing about Twitter lists is that you can make a bunch of different lists for different reasons. For example, I made this beat check Twitter list to help Florida Focus students find news of the day in the Tampa Bay area.

    I found local officials and government organizations like the Tampa Police Department and Hillsborough County. These are great sources of information and media that our news outlet can publish.

    For Hashtag Our Stories, I created this Twitter list. Hashtag Our Stories is very different than Florida Focus. For one, Florida Focus is a local news program that airs on TV, while Hashtag Our Stories is a global social media outlet. The target audience for Florida Focus is an older person who watches PBS. Whereas the target audience for Hashtag Our Stories is 13-24 year olds who use Snapchat, Instagram and Facebook for positive stories about people changing their communities.

    You can create a Twitter list by clicking “lists” on your Twitter profile. This is for desktop, but you can do the same on the mobile app.

    Then click the “create new list” button in the top right.

    You should name your list something specific so you can organize them. If you plan on making your list public, a specific name will also help others who subscribe to your list.

    Once you’ve created your list, you can add relevant accounts by typing in handles in the member search.

    After adding members, you can easily scroll through all of their tweets in one place.

    Then, you can take it one step further and view your lists in TweetDeck for super efficient Twitter account and hashtag monitoring.

    Check out these tips from npr

    https://training.npr.org/2015/10/20/9-types-of-local-stories-that-cause-engagement/?utm_source=npr_newsletter&utm_medium=email&utm_content=20190416&utm_campaign=training&utm_term

    USF Story Ideas

    Many USF departments and colleges also have compelling content on their social media platform that can inspire great story ideas.

    Tampa Bay story ideas

    You can use events to spark ideas for stories you’d like to turn into a feature. Instead of covering the event itself, consider the stories inside the event. What’s the organization hosting the event? Who are the people attending the event? Do they have compelling stories your audience would be interested in? Is there a larger story that’s bigger than the event itself?

    For example, February is Black History Month. You could find a Black History event and develop an evergreen story idea out of that event instead of just covering what’s happening that day.

    • Is there a relevant event you can attend where you can shoot b-roll and find people to interview about why we need to recognize this month?
    • How has education changed in local black communities in the past few decades?
    • Perhaps you can feature an inspiring person who is making a big impact on their community.
    • You could feature a black-owned business that’s a staple in the community.
    • Perhaps you can look at the increase in hate crimes these past couple of years and do a data journalism story?
    • What can your audience do to promote racial justice?
    • Explain the new gentrification in Tampa Heights.
    • Which judges are perpetuating the cycle of unjust sentencing? What should your viewers know about these judges before they vote?

    There are stories everywhere waiting to be told. Let an event be a starting point, then take a few more steps, do a little more research, and find an angle you’re passionate about.

    Try National Health Observances: https://www.welcoa.org/health-observances/

    You can also find many timely holidays and observances at the United Nations: https://www.un.org/en/sections/observances/international-days/

    Please bounce ideas off me or let me know if you have any questions.

    I also encourage you to develop story ideas using these resources:

    Featured image credit: USF

  • Resumes, Cover Letters and Reels

    Resumes, Cover Letters and Reels

    Cover Letter

    • Always include a cover letter. Many managers won’t look at your resume or application without a cover letter.
    • Don’t bury the lead! Tell the manager IMMEDIATELY what job you’re applying for and why they should hire you.
    • Be concise. The manager is judging you by your writing ability regardless of what job you’re applying for. Keep it short.
    • A single typo may cost you the job so proofread like 20 times, step away and proofread again after a few days. Then do it again.
    • Format your cover letter properly. One page only. Most cover letters should follow traditional formats, but you may want to be creative depending on where you’re applying. Ex: applying for BuzzFeed? Write a listicle and SEO headline to match their branding.
    • The hiring manager isn’t looking to help someone who needs a job. It’s your responsibility to tell the person reading your cover letter why they need you. They don’t care about what you want. Their job is to make money. How will you make them money? 
    • They also probably don’t care about your childhood because they’re running a business, not a daycare. Don’t tell them what you’ve dreamed of becoming ever since you were a kid. It’s cliche and off putting.
    • Never write “I believe.” Are you the best or not? They don’t care if you believe you’re a great fit. Are you the best… or not? If your cover letter doesn’t exude confidence, start over and do it right or you’re wasting your time.
    • Add references at the bottom. Include their name, title and contact information.
    • Proofread again.
    • Don’t be overly formal, you’ll sound young and inexperienced. Don’t call people “Mr.” or “Ms.”
    • No one wants to read your essays or your thesis. Unless you’re applying to work at a college, work examples means content that will help the manager see what type of worker you will be. You won’t write a thesis at your news job so leave that out and focus on relevant examples like websites, articles, videos and infographics.
    • Follow every single application instruction precisely. This is a test. It’s usually pass or fail.
    • I never had a news/TV boss who cared about my GPA or the classes I took. They want links to videos, articles, Twitter followers, number of tweets, analytics, anything that will make them money. Quantify your skills.

    Here are two different example cover letters. This one is generic:

    Jeanette Abrahamsen cover letter example.jpg

    This one is for a specific job:

    March 12, 2019


    University of South Florida
    Zimmerman School of Advertising & Mass Communications
    4202 E. Fowler Ave.
    Tampa, FL 33620

    Dear Search Committee,

    I am writing to apply for the Instructor I position at the Zimmerman School of Advertising and Mass Communications. I could not be more grateful for my time as a visiting instructor and adjunct professor at the University of South Florida. I would love to become a permanent member of this team so I can continue to invest in USF the way USF invested in me. USF propelled me into a career where I climbed higher than I thought possible. I want to give my students the skills and determination to do the same.

    While earning my bachelor’s degree in broadcast news, USF gave me a platform to air my stories in one of the country’s biggest TV markets. This gave me a tremendous head start. It allowed me to pursue my dream of working in San Diego, America’s 28th largest TV market. I started working at the ABC affiliate, KGTV, as an assignment editor. I published stories on 10News.com and was promoted to write and line produce live TV newscasts.

    My executive producer was so impressed with my work ethic and enthusiasm that he offered me a life changing opportunity when he became the news director at the San Diego Union-Tribune, then known as U-T San Diego. I was his first hire. He and I built a TV station from the ground up. He originally hired me as an executive producer but quickly promoted me to be the assistant news director. I hired 80 people and oversaw a $5.5 million budget. I developed and launched 13 news, entertainment and sports programs. I collaborated on a redesign of the website to launch a livestreaming player. During my tenure, U-T TV won nine regional Emmy Awards.

    Throughout this incredible experience, I realized that one of my favorite parts was teaching more than a hundred print journalists how to tell stories using new tools and techniques. I helped hard working storytellers keep their jobs because they could now report for web and social media using their cell phones. Mobile journalism was just beginning to emerge. In the six years since, technology has advanced at a tremendous rate, and so has my passion for innovating our industry.

    This passion drove me back to USF so I could get my master’s degree in digital journalism and design. While earning my degree at USFSP, I became a producer at Tampa’s NBC affiliate. Because of my experience creating programming, I was responsible for developing and launching five newscasts for WFLA and WTTA.

    I now use my strong ties to local media outlets to give back to my students. Several times a year, I host events with the Tampa Bay Association of Black Journalists and help my students get internships, scholarships and jobs. I collaborate with Hillsborough County to publish student stories on HTV and online. My Advanced Reporting class works with Tampa’s NPR affiliate to produce award-winning shows. My students help create and promote the Florida Focus brief that airs on WEDU.

    As a visiting instructor, I have been charged with reworking our digital media curriculum by innovating several journalism courses. I am in the process of building a new digital network for the university where students, staff and faculty can publish and discover multimedia content. My meetings across campus have led to exciting collaborations that benefit our students.

    In addition to teaching video, writing, web design, social media, broadcast news and reporting, I pride myself on showing students the future of media. I take my students to virtual reality studios so they can experience the power of immersive 360 storytelling. We collaborate on social media and augmented reality projects with the Innovative Education Department and the Honors College. I also partner with some of the biggest innovators in journalism like Yusuf Omar who won the world’s first ever Snapchat award for helping rape survivors spread awareness while maintaining anonymity and authenticity.

    The teaching website I built on WordPress is JeanetteAbrahamsen.com. You can also see examples of my work on my YouTube channel www.youtube.com/user/AbrahamsenJeanette. I am so proud to be part of a massive transformation happening at USF right now. I greatly appreciate your time and consideration.

    Jeanette Abrahamsen

    Resumes

    • One page only (a CV can be longer if you’re applying for an academic or health job, for ex).
    • Put your name, phone number, email address, website URL, Twitter handle and YouTube channel at the top of the page.
    • Reverse chronological order (most recent stuff goes on top).
    • Use keywords the manager put in the job listing. Most employers don’t actually read all resumes submitted for a job opening. Some managers will only look at the top 10 percent that scored highest on keyword automation. This is why a Word doc is so important. Some software won’t properly identify keywords in a PDF.
    • Tailor each one of your resumes to fit the job you’re applying to.
    • You can make a pretty resume for the interview, but for the application, submit a traditional Word doc so you ensure the computer software properly scans it.
    • Don’t be wordy. Don’t use complete sentences. Use bullet points. If you use periods at the end of your sentences, make sure it’s consistent.
    • Don’t waste your space with an objective.
    • Proofread again.
    • Keep it short.
    • Your skills section should be a list of the equipment and software you can use like WordPress, Adobe Premiere Pro, etc. Don’t add things like Word because that’s like writing that you know how to turn on a computer.  If you list it, make sure you actually know it. Think you can speak Spanish because you got a B in seventh grade? Your boss might make you do a report in Spanish on live TV, so think twice before adding it to your skills.

    Here’s an example:

    jeanette-abrahamsen-resume

    Here’s what my resume looked like when I was a senior at USF getting my undergrad degree:Jeanette 2009 resume jpg.jpg

    Demo Reels

    Depending on the job you’re applying for, managers may ask for your reel. These are the most common types of reels:

    • Reporter/Anchor reel
    • Producer reel
    • Videographer/editor reel

    A reporter reel should start with the very best (most creative/active) stand-ups. Stand-ups should be about 5-10 seconds each, edited quickly back to back for about a minute or two. If you have anchor desk videos, you can add a few seconds of those, just make sure the best are first. If you have lots of stand-ups and lots of anchor desk video, you can also cut a separate reel for each. After the stand-ups, you should add your very best pkg (the entire pkg). Then add your second favorite pkg after that so the hiring manager can scroll through video from one URL.

    A producer reel is a short montage of your best shows like a bunch of little trailers back to back. Some managers don’t want to watch producer reels. They’re more likely to ask for several A-blocks so they can judge stacking, pacing, story choice, flow, writing, etc.

    Here’s an example of my old entertainment reel:

    A few years back I stopped making producer reels. Instead, I submit a YouTube playlist for my newscasts like this:

    That way I can tailor the playlist to the specific job. Looking to hire me to work at the Food Network?

    How about a health show?

    Need a promo producer? I’m your gal:

    Or, are you just looking for a producer to drive ratings with teases and good opens?

    Another less traditional option is an “about me” video that starts like a reel like this:

    While we’re here, let’s check out how I customize my YouTube channel to increase my chances of getting a good job: https://www.youtube.com/user/AbrahamsenJeanette

    Videographer and editor reels

    Website Portfolios

    https://jordonjmyers.com/

  • 10 Helpful Headline Tips To Catch People’s Attention

    10 Helpful Headline Tips To Catch People’s Attention

    1. The first headline writing tip is to start with the number 10. Starting with a numeral increases your chances of getting clicks.
    2. Numbered lists are more likely to get clicks too because readers know what they’re getting themselves into.
    3. Tell your readers why they should care right away. Always answer “so what, who cares?”
    4. Deliver. Don’t promise a story in a headline if you don’t deliver it in the copy. Make sure your headline accurately represents your story. Otherwise, it’s considered clickbait.
    5. Use keywords related to the topics in your story to boost your search engine optimization.
    6. Write 25 versions of your headline and pick the best one. It takes time to write a good headline. Prioritize this process and you will write better headlines.
    7. Use powerful and emotional verbs.
    8. Use active voice, not passive.
    9. Headlines with approximately six words tend to earn the highest number of clicks (between 35 to 60 characters, spaces included).
    10. Use a compelling featured image that reinforces your headline’s message. Headlines with images are more likely to catch people’s attention.

    Free Headline Analyzer

    There are lots of free headline analyzers you should test your headlines in. I suggest trying CoSchedule. Note: It’s nearly impossible to get a headline score of 100. Anything over 60 is usually good. Use their tips to test out different headlines for the same story.

    Screen Shot 2017-09-24 at 1.31.10 PM.png
    Courtesy: CoSchedule

    Screen Shot 2017-09-24 at 1.21.28 PM.png

    Screen Shot 2017-09-24 at 1.19.15 PMScreen Shot 2017-09-24 at 1.19.32 PM

    guide-how-to-write-catchy-headline.jpg

    Which headline would you be more likely to click?

    headline kneeling

    Buzzsumo looked at headlines online and on social platforms. Check out their report called, We Analyzed 100 Million Headlines. Here’s What We Learned.

    Here are a few interesting takeaways from their report:

    TopHeadlinePhrasesTopPhrasesStartingHeadlinesheadline_words_engagementsTopNumbersUsedInHeadlines2

    Related Resources:

    8 headline tips to draw readers on social media

    https://twitter.com/JNetAbrahamsen/status/903967436524924928

  • StoryCorps: Listen, Honor, Share

    StoryCorps: Listen, Honor, Share

    Our mission is to preserve and share humanity’s stories in order to build connections between people and create a more just and compassionate world.

    https://youtu.be/4C9J9_r17XI

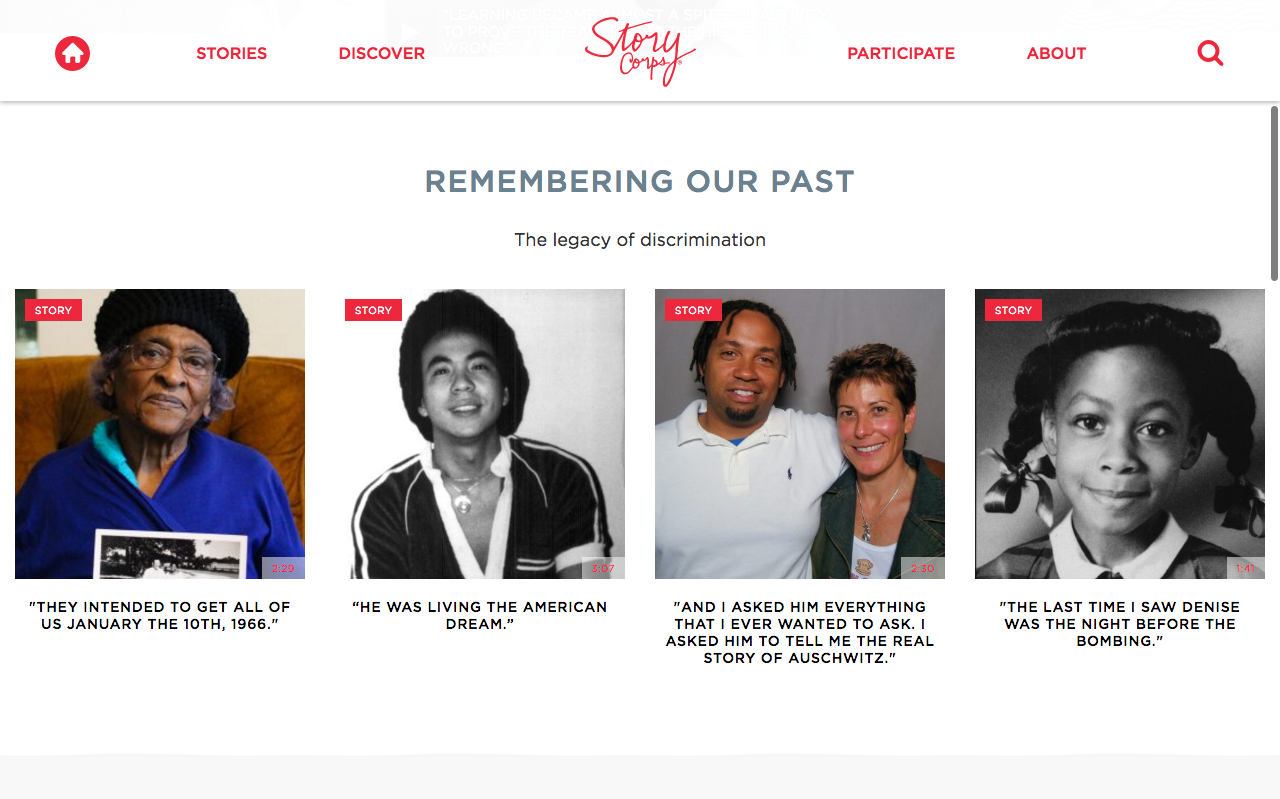
    StoryCorps is one of the most powerful storytelling tools in our country. It gives real people an opportunity to tell their stories. Topics range from traumatic experiences like war, racial discrimination, and imprisonment, to heartwarming topics like love, family, and friendship.

    StoryCorps audio is broadcast and streamed on NPR stations and websites. Their main format is audio, but they also post video stories using animation, photos, and quotes. Here are a few examples of StoryCorps stories from the StoryCorps YouTube channel.

    Take a look at how StoryCorps displays their multimedia stories on their website:

    I encourage you to subscribe to their free podcast.

    Want to work or intern at StoryCorps? Apply here. I also suggest you take a look at their blog to learn more about their initiatives like the Justice Project.

    Check out some of their interview questions on their Instagram account:

  • Lighting Tips and Tutorials

    Lighting Tips and Tutorials

    If you don’t have a lighting kit, you can use natural light to improve the quality of your videos and photos. Pay attention to where light is coming from and the shadows it casts.

    The best light is diffused sunlight. This reduces shadows. You can easily defuse sunlight by placing your interview subject inside with their face toward a window or sliding glass door. Avoid setting up your interview subject with their back to a window unless you can add a ton of light on their face. If you don’t have a lighting kit, I suggest you avoid this all together.

    Take a look at the first photo for an example of a backlit interview. There’s not enough light on my face to fight the light coming in behind me. I could open my camera iris to better see my face, but then I would overexpose the background even more.

    The second photo is taken in the exact same spot. I simply spun around to face the light.

    IMG_8085IMG_8083

    Another error many beginners make is setting up an interview outside in the middle of the day. When the sun is directly above people’s heads, it casts unflattering shadows on their faces like this:

    IMG_8080

    You don’t need a lighting kit to light your interview if you have diffused sunlight. But what about when you’re inside a building with no natural light source? Most light from lamps or light fixtures in offices or homes isn’t strong enough to look great on camera. That’s where lighting kits come in.

    Three-point lighting kits are the most common. They contain a key light, fill light and back light, aka hair light. But I just told you not to backlight your interviews right? For most interviews your key light and fill light should be much stronger than your back light. Most lights give you the option to reduce the strength. Or, you can move your back light farther away from your interview subject to weaken the strength. You want to use back light to softly add depth so your interview subject doesn’t blend into the background. But, your back light should not be so strong that it shoots into your camera lens and degrades the resolution of the person’s face.

    lighting.png

    Your University of South Florida email will get you free access to Lynda.com. Here are some video courses on interview lighting:

    Those go in depth. Here are the most useful videos from those courses:

    Tips:

    • Don’t get burned. Some lights get very hot, very quickly. Wear gloves to stay safe.

    https://twitter.com/JNetAbrahamsen/status/908858556174266368

    Featured Image: Film Set by Alex Lang (CC BY-SA)

  • What’s Wrong With This Picture?

    What’s Wrong With This Picture?

    Mistakes. We all make them. Try to learn from other people’s mistakes so you can avoid repeating them. Small mistakes can ruin a great video. As a producer, I refused to air a package because of a single poorly lit frame or disheveled shirt collar. If you make a mistake while you’re shooting, DON’T include the mistake in your edited video.

    The following videos all have great components, but I would never use them because of a few errors. Let’s watch them and identify mistakes you should avoid in your next video.

    Here are a few lessons from this video:

    • You should pay attention to the backdrop of your interviews. Make sure backgrounds enhance your visual. The background shouldn’t detract or distract. You should especially avoid interviewing more than one person in the same spot if your background looks ugly. Also, remember to pull your interview subjects away from the background. Creating depth will help push the background out of focus so your viewers can’t see all those wrinkles or imperfections behind the person.
    • Use b-roll to transition from one interview to the next. If you’re editing two interviews back to back and the interviews weren’t shot the exact same way, you should make sure they have different backgrounds, different distances, different angles, etc. The dissolve transition at 00:11 looks unprofessional.
    • Use lead room to create negative space in the area where your interview subject is looking. The first interview had decent lead room, but the second interview was centered. Only center an interview if the person in the video is looking into the camera. Most of the time, you’ll want to interview people on the rule of thirds and have them look either left or right of the camera (depending on which side you’re standing on).
    • Is this really the most relevant thumbnail for this video? Make sure you pick relevant and visually compelling images to showcase your videos.

    Here are a few lessons from this video:

    • Better lighting would have dramatically enhanced the quality of the b-roll at the beginning of this video. If you don’t have a lighting kit, use natural light. Instead of shutting the blinds in shots like 00:02, open the blinds and use that sunlight. Just make sure you move the camera so you’re not backlighting.
    • When you cover an interview with b-roll, make sure you use a sequence of at least three clips of b-roll before returning to the interview. The b-roll at 00:11 doesn’t flow that well since the editor immediately returned to the interview video after one clip of b-roll. This looks like you’re just trying to cover a jumpcut. Remember b-roll should enhance your story.
    • Take a look at 1:28. The videographer did not follow the rule of thirds or use lighting. The iris should also be opened more when you shoot people with darker skin tones. Remember that darker skin reflects less light. That means the camera can’t capture as much detail if the videographer doesn’t add light and open the iris.

    Here’s the main lesson from this video:

    • For the most part, this video is pretty well shot. But, I would not post this because of one small, but very important detail. Go to 3:10 and take a look at this poor guy’s shirt collar. Remember to help people out. If someone you’re interviewing has something out of place like a messed up collar, hair sticking up, crooked tie or necklace, fix it!

    Here’s the main lesson from this video:

    • If you’re doing a story about a food truck, immediately show me lots of extreme close-ups of food. Food can be the easiest b-roll because there’s usually texture, depth and color. Get extremely close to the food and make sure there’s lots of light on it.

    Here’s the main lesson from this video:

    • Always check your video before you leave a shoot. If your video is overexposed, reshoot it. It’s very difficult to improve overexposed video. If your camera has a manual iris, make sure it’s at an appropriate size to let in the right amount of life. Don’t backlight your interviews.

    Here are a few lessons from this video:

    • You don’t need to start a video on a person’s face. Try starting with nat pops or sound bites covered by super compelling b-roll. Your first few shots should be the best video from your entire project. Start strong.
    • Use b-roll sequences. Don’t cover an interview with one clip of b-roll and then return to the video. Layer at least three clips of b-roll back to back over the interview sound, then return to the interview video.
    • Avoid using a company’s logo (like at 00:15) unless it’s a beautiful logo and fits naturally into the frame. Those black bars on the side kill me. Make your own graphics if needed (try Canva).
    • Shoot a variety of angles, heights and distances. Where are my extreme close-ups?

    Here are a few lessons from this video:

    • B-roll should generally only last for 3-seconds each. The opening shot was way too long.
    • Don’t backlight people. The shot at 00:25 was too backlit. Instead, use the light to your advantage. Let the light shine on his face, not his back.

    Here are a few lessons from this video:

    • Graphics change quickly. What was considered acceptable a few years ago, isn’t anymore. Be modern, clean, clear. Text should look cool and fit the theme. If you put text on the screen, leave it up long enough for people to read it. Better yet, put less text on the screen. Avoid back-to-back text full screens. Text should enhance the storytelling. It should be concise and important.
    • Headroom and lead room off in most interviews.

    Try to identify errors in the following videos to help you prevent making the same mistakes in the future:

  • Photography & Videography Basics

    Photography & Videography Basics

    Rule of Thirds

    Everyone in TV is expected to understand and follow the rule of thirds in EVERY interview and every b-roll clip. This is IMPORTANT. The good thing is, it’s also super simple if you enable grid bars on your phone or camera. DO NOT shoot without your grids enabled.

    • The rule of thirds means that the important compositional elements or subjects should be along the lines or at the intersections of the lines. 
    • Usually, a person’s eye, nose or the bridge of their nose should be at the upper right or left intersection of the lines. They should look across the screen. This will give them lead room. One of the only times you will intentionally break this rule is if you’re trying to create a negative emotion in your viewers. DON’T do that in this class. That is much more common in film. You will rarely find a reason to break this rule for TV news. If you think you want to try, always shoot two versions. I’ll almost always tell you to go with the version that includes lead room and follows the rule of thirds.

    Not all rules are meant to be followed all the time. But you have to know what the rules are, so you know why and when to break them.

    Framing Overview

    • If you’re conducting and in-person interview, the interview subject should be on either the left or right vertical grid line looking across the screen at the interviewer.
    • If your’e conducting a remote interview like on Zoom, for example, they should be centered looking into the camera.
    • If you’re on camera for a reporter standup, you should look into the camera. If you have a reason to be off centered because you’re demonstrating something, you do not need to be centered. If you’re not actively showing something and you’re just talking to the camera, you should be centered.

    Avoid:

    • Shooting outside when the sun is high in the sky. It creates shadows under people’s eyes and nose.
    • Too much backlight. You will either blow out your background or create a silhouette of your subject.
    • Using a flash for still images.
    • Shooting under a tree when the sun is out. This creates shadows on people’s faces.
    • Placing your subject up against a wall. Create depth by shooting farther away from your background.
    • Too much or too little headroom and lead room.
    • Zooming in while recording video. Use your feet, not your zoom, (unless you’re intentionally trying to create a shallow depth of field).
    • Shooting vertical video (if your’e shooting for TV).

    Tips to Shoot Better:

    • Shoot outside when skies are overcast. The clouds create an even light filter which means no shadows.
    • Shoot in the shadow of a large building. If everything you are shooting is in the shadow, it creates an even light distribution similar to overcast skies.
    • Always think about headroom and lead/nose room.
    • Shooting action is more interesting. Capture moments
    • Get a variety of shots
      • wide (sets the stage)
      • medium
      • close-up
      • extreme close-up (reveals emotion)
    • Get a variety of angles
      • put your camera on the ground
      • hold your camera above your head
      • shoot your subject’s reflection in a window, mirror, puddle, etc.
    • Enable the grid view in iPhone’s camera app to follow your rule of thirds.
    • You should also use grid view in Android phones like Samsung, but you should also hold the phone still for longer than you think when there’s low light.

    Lighting can help you or hurt you depending on how you use it. I took these two pictures while I was sitting in the same seat. Notice what a big difference the lighting makes when I turn slightly. The first picture is way too backlit. The lighting coming from the window behind me forces my camera iris to close so my face is too dark. The second photo uses the lighting to improve the photo quality.

    Interviewing in person & inside

    If you’re interviewing someone in person inside use a window as a source of diffused light. The light must hit their face, not their back.

    In-person interview framing GOOD 4.png
    In-person interview framing BAD 7.png

    Interviewing in person & outside

    If you’re interviewing someone in person outside keep them AND the background in the shade to create even lighting. The main source of light (like the sun) should always hit the person’s face, not their back. Make sure you create lead room or nose room and follow the rule of thirds.

    In-person interview framing GOOD 3.png
    In-person interview framing GOOD.png
    In-person interview framing BAD.png
    In-person interview framing BAD 3.png
    In-person interview framing BAD 2.png
    In-person interview framing BAD 4.png
    In-person interview framing BAD 5.png
    In-person interview framing BAD 6.png

    Interviewing remotely

    Interviewing remote good.png
    Interviewing remote bad 2.png
    Interviewing remote bad.png

    These are examples of acceptable centered reporter standups. They are well-lit and properly framed:

    Screen Shot 2020-12-10 at 4.44.00 PM-1.png
    Screen Shot 2020-12-10 at 4.46.19 PM.png
    Screen Shot 2020-12-10 at 4.48.11 PM.png
    Screen Shot 2020-12-10 at 4.49.18 PM-1.png
    Screen Shot 2020-12-10 at 4.53.12 PM.png

    These are examples of acceptable in-person interviews. They are well-lit and properly framed:


    These are examples of unacceptable shots:

    Do not shoot an interview or standup inside unless you have a lighting kit OR a natural source of light like a large window or glass wall. This lighting is not acceptable. I don’t care what background you’re trying to show. The priority ALWAYS needs to be light on your face or the face of an interview.

    Screen Shot 2020-12-10 at 5.04.32 PM-1.png

    Your interview should NOT be centered and looking off camera. This is unacceptable:

    Screen Shot 2020-12-10 at 5.13.41 PM.png

    NEVER EVER EVER interview two different people in the same exact spot. This makes the interviews feel staged and inauthentic. You should also pull the people you’re interviewing away from the background. The following interview is unacceptable because it’s in the same location as the previous interview, the rule of thirds is not being followed and the person being interviewed is too close to the background.

    Screen Shot 2020-12-10 at 5.16.37 PM.png

    This interview subject should NOT be centered. They should be on the left vertical line, looking across the screen. 

    AVOID vertical images and videos at all costs when making TV. TVs are still horizontal for now. So your content must fill the entire screen. NO black bars EVER. If you absolutely must include a vertical photo or video, you’ll need to think of a creative way to visualize it. You could:

    • record over the shoulder video of the person holding the photo
    • add the vertical photo to a motion array template that matches the mood and style of your video
    • In very rare instances, I might ask you to at “blurred wings” where you zoom into the photo, blur the photo, then add the vertical image on top in Premiere Pro, but this is for emergencies only.

    This interview is not airable because it was not shot properly. There’s no way to rescue this because the sky is way too blown out. The iris was way too open and the interview never should have been set up in front of a bright sky to begin with. The shadows on his face are distracting and the colors look poorly edited.

    This interview is out of focus and not well lit. If you’re shooting with your phone, make sure to tap and hold on the person’s face to lock the focus and exposure before you record. If you’re shooting with a DSLR or ENG camera, zoom all the way in, then focus, then zoom out.

    This interview lighting and focus is unacceptable:

    This reporter should have stepped like 20 feet away from the wall behind her so she’s much closer to the camera and has proper headroom. DO NOT stand so close to walls. This is not acceptable:

    IMG_0546.jpg

    This is unacceptable because the woman’s lav mic cable is showing, she’s in the shadow of a tree, the camera tripod is not eye level and there is improper lead room.

    More tips

    More Examples

    Take a look at the following photos and identify what’s wrong and right about each one.

    photo 2
    There is too much backlight in this photo. It makes it difficult to see the details on the people’s faces. If you have light behind your subject, tap on their faces with your camera phone, or increase the aperture/ISO on your DSLR, or open your iris on your EFP camera. Or just move so that you are not facing the window.
    backlit
    The resolution of this photo is poor because the light coming in the window creates too much backlight. The photo was edited to lighten the woman, but that also means the details in the background were lost and blown out.
    backlight
    Backlight is used intentionally to create a silhouette. There is plenty of lead room and negative space. And the man’s head is in the upper left following the rule of thirds.
    12439220_10156563670210121_2266016789600753324_n
    Backlight is used intentionally to create a silhouette. The sunlight creates solar flares around the boy and illuminates his lightsaber.  The boy’s shadow is intentionally included in the shot. However, this would have been even better if I were farther away from the boy and included his entire shadow. I intentionally did not follow rule of thirds because I like the lines created on either side that point towards the center.
    11866371_10156046081960121_5856099838919267846_n
    This is an example of intentional backlighting creating a silhouette. There’s a little too much headroom.

    I adjusted the shot to frame it more precisely to the rule of thirds:

    Screen Shot 2016-01-23 at 10.59.29 AM.png
    Use negative space intentionally. Lead room should create space in the direction the person is looking.
    12032221_10156194570605121_2187108673596306198_n
    Check out this lead room.
    1002697_10155331635045121_1382343330268754894_n
    Create negative space on the upper left because that is where the baby is looking.
    10434029_10155216997905121_8660938903539310355_n
    Layer your shots. Look for opportunities to create depth and focus. This is taken with an iPhone. Tap the person or item you want to focus on, and it puts the rest out of focus. This has a shallow depth of field. It also has a dark vignette to ensure people focus on the light part of the shot.
    12039615_10156194584400121_8230725930057061889_n
    Frame your shots. Get close.
    12032012_10156189871585121_7841895742523612919_n
    Here’s another way to frame a shot.
    11081221_10156104633355121_6042461143018520302_n
    This has a shallow depth of field. It also shows how effective extreme close-ups can be. Also note the height and angle. The camera is nearly touching the table, pointing in an upward direction. This also has vignette.
    11209678_10156163632115121_5529001076168746451_n
    This has a shallow depth of field. The flower in focus is an extreme close-up.
    12019978_10156167347125121_9144979627679459464_n
    Extreme close-ups and a creative angle makes a huge difference. Remember to get close to people and things you’re shooting.
    10401580_10156458561200121_8971519485885238494_n
    Get close. Use extreme close-ups often.
    12032077_10156168755460121_3607410369383179147_n
    The right angle tells a better story and looks more interesting. Angles also help create shallow depth of field. If this photo were taken from standing up several feet away, it would not create the same effect. A shallow depth of field gives photographers power to control what people focus on.
    12037966_10156172573130121_5875846750858875152_n
    This is a reflection shot. The sun is setting in the reflection of the man’s sunglasses. Remember to look at things differently. A sunset is great, but it’s more interesting when you see it through someone else’s eyes.
    12009770_10156172809245121_6926945267821859546_n
    Lead room & reflection shot. Notice your subject’s headroom should get smaller as you get closer to them.
    12042712_10156179467135121_8516245824764207404_n
    Angles make all the difference
    12029561_10156203334715121_7560048281234986793_o
    The camera is touching the ground looking up because it fits with the overall emotion of the photo. Your angle and height should match the feeling. In the same way that an extreme close-up would evoke emotion, this wide shot and the angle evoke power, and plays on the over the top comic scene.
    10671496_10156291507170121_8218493165544766983_n
    Your viewers become more immersed in a scene when you include shots from behind or over the shoulder.
    Editing Apps
    • Instagram
    • Adobe Premiere (video)
    • Adobe Photoshop (images)
    • Snapseed
    • iPiccy

    It’s easy to make good pictures better with simple edit tricks:

    Before:

    img_6816

    After:

    When editing becomes unethical

    The picture we just looked at is clearly improved after adding a few effects. But when can edits be unethical? The following video discusses the controversy surrounding one editor’s decision to darken O.J. Simpson’s face on the cover of TIME magazine.


    Here are more photos from Instagram to inspire you to use different angles and lighting techniques:

    cool pic
    10258483_10155803354390121_2472392935970798802_n
    violin
    lead room
    254563_10152210250035121_1812214272_n
    382083_10152295749130121_137717861_n
    533982_10152323665170121_1960565898_n (1)
    154674_10152323666885121_780552787_n
    427109_10152904467615121_202147795_n

    Photojournalism

    Once you learn the basics of photo composition, you can really start to tell stories. When you use photos or video for storytelling, make sure your framing and lighting help you tell an emotional story.

    Get inspired by taking a quick free course on Poynter’s News University website called “Best of Photojournalism: What Makes a Winner.”


    5 Tips To Keep In Mind Before Your Next Shoot

    Al Tompkins created this video with examples of good lighting and better video. This video is from a few years back so ignore 5:40-6:06. 16:9 is now the industry standard.

    I encourage to you refer back to his tips before your next shoot:

    1. Put the camera on the shadow side of the subject you’re shooting.
    2. Use steady sequenced video. Stop panning and zooming!
    3. Pay attention to natural sound and keep your headphones on.
    4. Pay attention to framing. Smaller screens need close ups.
    5. Work closer to your subject. Zoom with your feet, not your lens.

    While you watch any video (TV, film, ads, etc.) pay attention to each photography technique:


    Don’t forget audio

    • Natural sound (nats) help immerse your audience in your environment. Listen to your surroundings.
    • Always wear headphones to hear what your mic hears.

    Watch and learn. Follow Storytellers on Facebook:

    Screen Shot 2016-01-24 at 1.09.49 PM.png

    You can also check out some inspiring work on their YouTube channel TV News Storytellers.


    Get Involved & Get Inspired

    The National Press Photographers Association has a great website with lots of beautiful photography examples.

    Connect with Bob Dotson. He’s been an NBC correspondent for four decades. You can watch many of his stories in the “Make It Memorable” section of NBC Learn.

  • WordPress For Broadcast News Class

    WordPress For Broadcast News Class

    If you’re new to WordPress check out some helpful beginner guides.

    Students at the University of South Florida have free access to Lynda tutorials. Just log in with your student email and search WordPress Essential Training.

    Posting your assignments on WordPress

    Go to WordPress.com and sign in using the email you used when you were invited to join the USF Broadcast News Group.

    Click the Screen Shot 2015-09-11 at 5.24.10 PM button in the top left of your screen that takes you to sites affiliated with your email. You will see two different views as WordPress rolls out its new format, the black or blue background.

    If your screen is black:
    1. Scroll down under “posts” and click on “add new.”
      Screen Shot 2015-09-11 at 5.28.32 PM
    2.  Then you’ll see category options on the right that correspond to each class project.
    3. Click the little box next to the project you are turning in.Screen Shot 2015-09-11 at 5.26.56 PM
    4. Paste your YouTube link into the body, it will then embed into your post.
    5. Add your text (script and/or web text).
    6. Then click publish. Always test your link in a new tab.
    7. Submit the link in canvas. Remember to submit the link to the finished post, not to your account. If you submit the link to your account, you will get points off.

    If your screen is white and blue:

    1. Click “add” next to “blog post.”
      Screen Shot 2015-09-11 at 5.36.29 PM
    2. Then look down on the left under “categories.” When you click there, you will notice several different assignments for other USF professors. Makes sure to only click on the assignment name that has “Abrahamsen” in the title.
      Screen Shot 2015-09-11 at 5.37.20 PM
    3. After you’ve added your media and text, click “publish” then submit that link in the assignment on Canvas. Remember to submit the link to the finished post, not to your account. If you submit the link to your account, you will get points off.

    Embed instead of upload

    Embed your social media, videos, pictures, gifs and memes to increase your engagement.

    Embedding is becoming a helpful tool to source your content. If you’re posting someone else’s tweet, for example, others can easily click on their handle to learn more about this person. This also helps your credibility. If you were the one who took the picture or made the meme, don’t you want credit too? By first posting your pictures on Instagram or Facebook, you will be able to embed media with links to your other platforms.

    When you embed media, the content will constantly update the number or views, shares, retweets, etc. This is much better than just uploading a screengrab that will be out-of-date the moment you post it.

    Embedding ties all of your social platforms together. It improves your chances of increasing your analytics. Many media companies these days will use analytics to determine if you get hired, and how much they will pay you. So start building those numbers up now.  If you upload when you should embed, you will also lose points on your assignments.

    WordPress is constantly updating and making it easier to embed, so make sure you use the most recent tutorials because there are lots of outdated ones online.

    The WP Beginner YouTube channel offers great tutorials to enhance your WordPress posts, pages, and sites.

    Here’s an example of what a YouTube video looks like when it’s embedded on WordPress:

    Here’s an example of an embedded tweet:

    Links

    Hyperlinking is a great way to drive engagement and add value for your readers. But don’t send your readers away to other people’s sites. I always suggest clicking the box that opens a new window when your reader clicks on a link on your page or post.

    1. Click the link button at the top of  your page or post when you’re in edit mode:wordpress link.PNG
    2. Then, check the box you see here that says “open link in new window/tab.” Then click “add link.”wordpress open link in new window.PNG
    3. You can also hyperlink the websites by highlighting a keyword in your page/post or you can adjust the “link text” in the window above.

    Jump links

    When you create longer blog posts or pages, you may want to include a menu or table of contents at the top so your readers don’t have to scroll through lots of text to find what they’re looking for. That’s called a jump link. Read this helpful step-by-step guide to adding a tiny bit of HTML code into your WordPress site to make your posts and pages more user-friendly.

    WordPress Tutorials

    Before you watch a tutorial, it’s important that you understand if you’re using WordPress.com or WordPress.org. Some tutorials are only relevant to one of those. For a quick rundown of the differences, check out this article on DIY Themes.

    Here’s a great rundown of how to embed audio into your post.

    WordPress has many video tutorials to improve your posts, pages, and sites.

  • Lead Writing For Broadcast News

    Lead Writing For Broadcast News

    Don’t feel like reading this lecture? Click here for a video of me explaining lead writing. 

    What is a lead?

    • The first sentence of your story
    • The best opportunity to grab a viewer’s attention
    • Similar to a headline
    The most important thing to keep in mind when writing your lead is that it must be clear and easy to understand.

    3 ingredients of a well-written lead

    1. Capture the essence of the story. What’s the point?
    2. Conversational writing. The anchor sounds like they’re speaking with someone, rather than reading a script at them.
    3. Most important facts of the story presented in a narrative. Remember how impact and emotion drive good storytelling.

    The art of the lead

    • Use clear and powerful statements so viewers know why they should care.
    • Always understand how your story affects viewers before writing your lead.
    • Active writing.
    • New, Now, Next.
    • Mom rule: write the way you’d talk to your mom.

    What makes something newsworthy?

    Ask yourself:
    • Does this story affect people?
    • How many people does it affect?
    • How long will the story affect people?
    • Does it have legs?

    Determining what’s new, now, next:

    • Who are the participants in the story?
    • What are they doing right now? (or at the time that the newscast airs)
    • What will they be doing next?
    Avoid:
    • Using a person’s name in the lead line, unless that person is known to every viewer.
    • Using too many facts or numbers in your lead line.
    • Assuming the viewers know what you’re talking about.
    • Passive writing.
    • Past tense.
    • Long sentences.
    Example of a poorly written lead:
    Twenty- nine- year- old Matt Thomas was arrested for the shooting death of eighty- nine- year- old Mary Smith near the Chase Bank on 4505 East Fletcher Avenue at eleven A-M.
    Example of a better lead:
    A FAMILY IS DEVASTATED THIS EVENING AFTER AN ELDERLY WOMAN WAS SHOT TO DEATH IN BROAD DAYLIGHT.
    THE MAN ACCUSED OF KILLING EIGHTY- NINE- YEAR- OLD MARY SMITH IS NOW UNDER ARREST.
    Note: it’s difficult to follow every “rule.” By trying to use “new, now, next,” parts of this is passive. I also felt her age was more important than writing in active voice in the second sentence. If I want to make the second sentence active I could write it like this, but then it would be past tense:
    POLICE ARRESTED THE MAN ACCUSED OF KILLING EIGHTY- NINE- YEAR- OLD MARY SMITH.

    See more examples in chapter 3 of the “Broadcast News Handbook.”

    Connecting with your viewer in your lead

    By understanding how a viewer is affected by your story, you can re-word your lead like these examples:

    • YOU MAY WANT TO INVEST IN SOME RAIN BOOTS BECAUSE IT’S EXPECTED TO FLOOD THIS WEEKEND.
    • IF YOU HAVEN’T BOUGHT ALL OF YOUR CHRISTMAS PRESENTS YET, TIME IS RUNNING OUT.
    • HAVE PLANS THIS WEEKEND? YOU MAY WANT TO CHANGE THEM ONCE YOU HEAR HOW MUCH RAIN IS HEADED YOUR WAY.

    Rule of Thirds

    We write for the ear. That means viewers don’t get a chance to go back and read what your script says. That’s why you should limit the number of items in a script to three.

    Example script:
    APPLE ADDICTS ARE GONG TO NEED SIRI’S HELP FILLING THEIR TIME UNTIL NEW GADGETS ARE RELEASED.
    {TAKE VO}
    A NEW I-PHONE IS JUST ONE OF THE INNOVATIONS EXPECTED AT TOMORROW’S BIG ANNOUNCEMENT.
    RUMORS ARE SWIRLING ONLINE ABOUT A HUGE I-PAD.
    PLUS, APPLE’S C-E-O PROMISES THAT VOICE ACTIVATED APPLE T-V WILL CHANGE THE FUTURE OF TELEVISION.

    Even though there were dozens of features I could have chosen to inform viewers about, I chose the three most important ones:

    1. iPhone
    2. iPad
    3. Apple TV

    RTDNA posted a great list of examples to keep your writing tight and accurate:  http://rtdna.org/article/writing_tip_avoid_unneeded_modifiers

    Lead writing example

    Write a good lead for the following story

    The Miami Dolphins lost in a 41-14 blowout against the Buffalo Bills on Sunday, but that was the least of cornerback Brent Grimes‘ worries.

    According to Adam Beasley of the Miami Herald, Grimes’ wife, Miko, was “arrested on charges of battery on a police officer” and“resisting arrest with violence.” She “also faces a charge of disorderly conduct, per Miami-Dade PD, the arresting agency,” Beasley reported.

    “Police say Miko Grimes broke through a police barricade and entered [a] restricted area, head-butted an officer & shouted obscenities,”reported WPLG Local 10 News.

    CNN provided video of the incident, which appears to show Miko Grimes being held down by police officers in the parking lot of Sun Life Stadium.

    This is not the first time Miko Grimes has made headlines. Per Jason Lisk of the Big Lead, Grimes went on a Twitter rant aimed at the NFL in January. After she had emergency oral surgery, her husband asked head coach Jason Garrett for permission to leave the Pro Bowl. However, according to Lisk, someone else in the NFL apparently “pulled his paid appearances when he missed practice.”

    This apparently sparked Miko Grimes’ commentary on a variety of topics regarding the NFL, including the league’s issues with domestic violence, Thursday night games, concussion concerns and franchise tags. Lisk pointed out the Twitter rant was “at 40 tweets and counting.”

    The arrest comes as Brent Grimes and his team begin to prepare for a Week 4 showdown with the New York Jets.

    COMMON ANSWER:

    Miami Dolphins cornerback Brent Grimes’ wife head-butts a police officer and yells obscenities. Miko Grimes is facing charges of both resisting arrest and disorderly conduct.

    PROBLEMS:
    • This is written like a headline, instead of a broadcast lead.
    • It should be in capital letters.
    • Including the name “Brent Grimes” in the 1st sentence because it makes it wordy.
    • If the person’s name isn’t known be the average viewer, you should use their title in the first sentence, then their name in the second.
    • When a person’s name ends in “s” it sounds weird to read it out loud with an apostrophe after the name. Try reading “Grimes’ wife” out loud.
    I suggest something like this:

    THE WIFE OF A MIAMI DOLPHINS PLAYER IS UNDER ARREST FOR HEAD- BUTTING A POLICE OFFICER DURING A GAME.
    MIKO GRIMES IS ACCUSED OF BREAKING THROUGH A POLICE BARRICADE BEFORE OFFICERS PINNED HER DOWN IN THE SUN LIFE STADIUM PARKING LOT.

    (Note: also remember to put each sentence on its own line.)

    WHAT’S THE DIFFERENCE BETWEEN A HEADLINE AND A LEAD?

    Example:

    Headline: Wife of Miami Dolphins player breaks through police barricade to headbutt an officer and is arrested on multiple charges.

    Lead: THE WIFE OF A MIAMI DOLPHINS PLAYER IS UNDER ARREST AFTER BREAKING THROUGH A POLICE BARRICADE AND HEAD-BUTTING AN OFFICER.

    Note: If you make it new, now, next, you can turn a headline, into a conversational broadcast news lead.
    Example:

    Headline: Football player’s wife arrested for headbutting officer.

    Lead: A FOOTBALL PLAYER’S WIFE IS UNDER ARREST FOR HEAD-BUTTING AN OFFICER.

  • Making Audio Visible

    Making Audio Visible

    Sound is considered an invisible medium. It’s tragic when storytellers ignore how powerful audio can be. Sound is incredibly vital to storytelling. A piece with great sound builds an environment where viewers and listeners can truly be immersed in the essence of the story.

    Anyone in media should always listen for sound.

    • If you’re a reporter or videographer, you must shoot with your ears. Listen to your surroundings and record that audio for a completely immersive experience.
    • If you’re an editor, look for opportunities to include sound anywhere. Silence is also just as powerful as sound, if it is intentional.
    • If you’re a producer, include as many nat pops in your newscast as possible. It will change the way your show feels and how much your viewers are affected by your stories.

    Nat = Natural sound

    One simple example of a story that uses nat pops would be a package on cooking that would start with 3-5 seconds of sound at the beginning. The story could begin with 3-5 seconds of food frying or a cook’s knife chopping food on a cutting board. This nat pop sets the scene so people are transported to a kitchen. Then throughout the story, an editor can include several more pauses between the interview SOTs and include more pops of natural cooking sounds.

    Examples of nat pops:
    • The sound of snow crushing underneath feet
    • The sound of waves breaking on a beach
    • The sound of a person crying
    • The sound of a person laughing
    • The sound of a car horn beeping
    • The sound of rain hitting the ground

    Characteristics of audio journalism

    • Presence: the credibility of being at a location
    • Emotion: tone of voice, intonation, pauses
    • Atmosphere: nat sound

    Immerse your viewers

    Anthony Bourdain is one of my favorite writers ever. He’s a famous chef and book author. He’s an incredible nonfiction writer who immerses people in an atmosphere. His words are beautifully crafted to help you feel, smell and taste different environments as he travels the world.

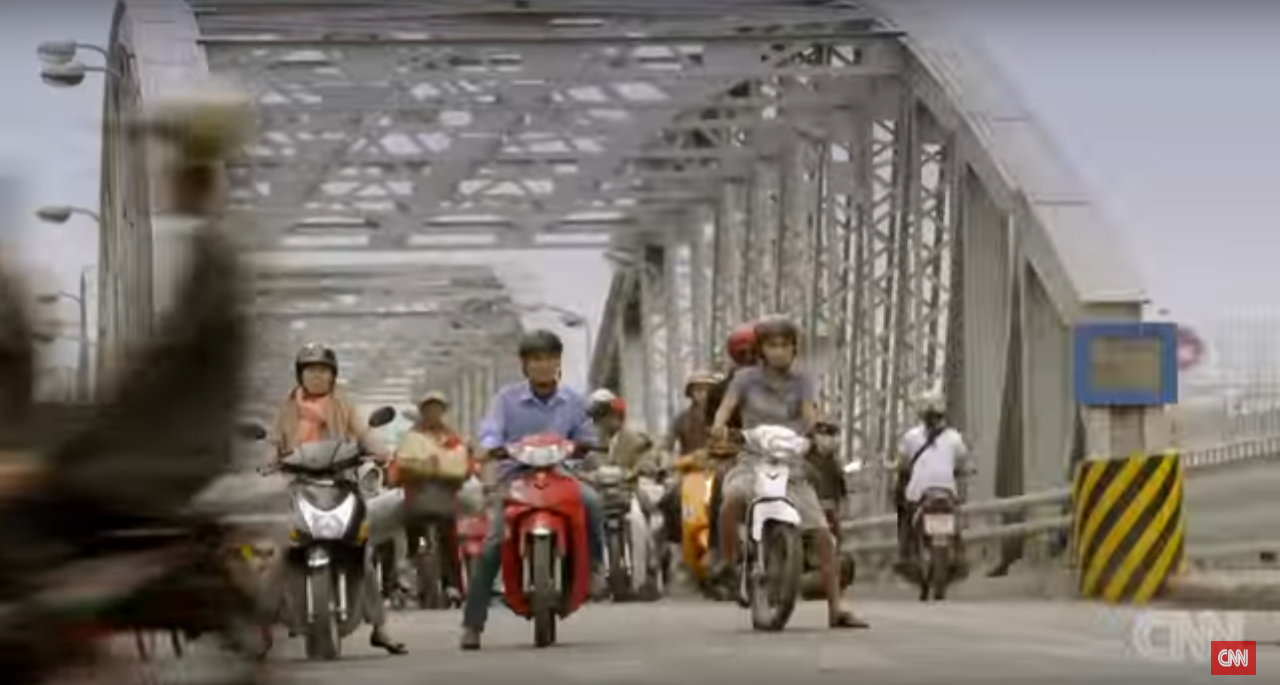
    Bourdain created several great shows I highly suggest you watch. His most recent project with his award-winning production company, Zero Point Zero, is his CNN show “Parts Unknown.” Watch a clip from the Vietnam episode and pay attention to Bourdain’s writing. Also, listen to the natural sound that enhances the audio experience. You don’t really even need to watch the show to feel like you’re a part of Bourdain’s trip because you can close your eyes and feel it.

    We will watch season 8, episode 1 of “Parts Unknown” in class. As you watch the President Obama episode, pay attention to how the editor used instruments to mimic the sound of the rain and music to set the mood. Also, listen to the questions Bourdain asks Obama. Envision the editor’s timeline. How many natural sounds did the editor layer, like roosters, crickets, music, drums, motorbikes, etc.?

    The Washington Post wrote an interesting article about how Bourdain’s storytelling style is changing CNN.

    Radio journalists generally do a much better job of using sound to tell stories than TV journalists. If TV journalists learn from radio and incorporate more sound into their storytelling, they can deliver a much more powerful product to viewers.

    “This American Life” won a Peabody for how they portrayed the economic crisis. Listen to this link to hear how they used sound to evoke emotion.

    Audio isn’t only used to enhance a TV broadcast, it is also an important tool to tie the platforms together. Nowadays, TV stations don’t only rely on broadcasts. They must also have websites, mobile apps, social media accounts, and YouTube channels. All of those are different platforms for a company to showcase their brand. Audio can also be used on all of those platforms in:

    • Reporter overviews: a reporter track of their story that often accompanies articles
    • Podcast: audio episodes on specific topics
    • Audio slideshows: a powerful way to add audio to photo slideshows
    • Breaking News: audio is a faster way to post news updates, the file sizes are also smaller and easier to post. Utterli is a free service for reporters to file audio from anywhere using a cell phone.

    Basic ingredients

    • Interviews and voice-overs
    • Nat sound
    • Music

    Audio recorders

    Cell phones are convenient tools to record sound. You can use the earphone mic to eliminate some ambient sound. Or you can plug in a lav mic and record on your phone.

    You can also buy a small digital audio recorder. You can use these just for posting audio, or to improve audio recording when shooting with cameras like DSLR.

    Here’s an example of how sound can be used to make an open better:

    Audio in the form of music, sound effects, and interviews helps break up the anchor track to grab people’s attention.