Author: JeanetteAbrahamsen

  • USF Digital Network

    USF Digital Network

    The University of South Florida Digital Network will showcase video content created by students, staff and faculty on usf.edu.
    why digital network.jpg

    The purpose of the digital network is to:

    • Create and share content made by students for students in one location
    • Celebrate accomplishments by students and employees across USF
    • Develop new curriculum to increase real-world training for students with innovative digital media technology
    • Create revenue opportunities to reinvest in student success
    • Recruit new students by showing what the university has to offer
    • Break down silos and increase campus engagement

    cooperation gfx digital network

    USF Digital Network Website Mockup

    This is an example of what the USF Digital Network website can look like.

    tablet-homepage.png

    Proposed Channels

    Featured Video
    The Featured Video section can house creative, trending, and important videos like President Genshaft’s fall address.

    Explore Tampa Bay
    The Explore Tampa Bay page will feature off-campus locations. Videos will include local beaches, attractions, parks, shops, etc. This can serve as a great resource for students to discover fun things to do in the Bay Area.

    Intercollegiate Athletics
    The Sports page will house videos about sports and include a push to the USF Athletics Bullsvision page. The Sports page will eventually also include live streams of USF sporting events.

    Student Documentaries
    The Student Documentaries page will include 5- to 30-minute videos created by students on topics they’re passionate about. Projects can come from mass communications classes like Electronic Field Production, TV Production and Direction, and Documentary Film Production.

    Health & Fitness
    The Health and Fitness page will house videos from USF Health and any other health and fitness related videos. There should also be a link pushing to USF Health on this page.

    Events & Entertainment
    The Events and Entertainment page will feature USF arts and performances like dance, theater and music. This page can house videos of the University Lecture Series and videos from the USF Sun Dome like graduations.

    Florida Focus News
    The Florida Focus News page will include news briefs produced by USF students in the Florida Focus class. The local news briefs will be uploaded Monday-Friday during fall and spring semesters.

    News in 90
    The News in 90 channel will include 90-second news videos created by students for USF Housing about campus news and events.

    USF Stories
    The USF Stories page will house short videos that could feature USF students, staff and faculty. Videos can come from mass communications classes like Broadcast News, TV News and Electronic Field Production. Innovative Education is also producing content that would be great in this channel.

    Community Stories
    The Community Stories page will include feature stories in the form of interviews with members of the Tampa Bay community. The stories can be about local heroes, entrepreneurs, business owners, inspiring people making a positive change in our area, etc.

    USF Campus Tours
    The USF Campus Tour page will take students and future students on tours through campus. Videos will also show behind the scenes of USF’s TV studios, Bulls Radio, and the Oracle newspaper. Videos can showcase the USF Library Media Commons, Innovative Education, engineering, etc.

    TEDx USF
    The TEDx USF page will house TED Talks from USF campus. The USF Center for Leadership and Civic Engagement posts talks on their YouTube page. 

    Education Abroad
    USF World and Innovative Education created several videos to inform students of education abroad opportunities. Students and teachers also have videos of their study abroad experiences.

    Food
    The food channel will include cooking segments and food-themed videos like farmers markets. 

    Finance
    The Your Money & Business page will house videos that will help USF students manage their finances and save money. The USF Muma College of Business YouTube page has several interviews with business leaders like Jeff Vinik and professor lectures. 

    You can see examples of some of the videos here.

    path-to-preeminence-gfx

    Preeminence: Key Questions To Ask Ourselves

    1. Are we regarded as the national model? If not, what do we need to do differently? We have the opportunity to be the national standard if we invest in digital media technology.
    2. Are we following best practices and making smart decisions? With this digital network, we will establish the best practices in new technology. We will invest in new technology to arm our students with the tools to succeed. We will build the network in such a way that we can continue to grow and adjust.
    3. Are we surrounding ourselves with A-level players and A-level team members? Are we recruiting, hiring and retaining the very best? By committing to a digital network we will attract A-level students and faculty from across the nation. We will raise the bar for our students and our faculty.
    4. Do we create an atmosphere where everyone feels valued and empowered? Where can we hold each other accountable for going above and beyond? Offering students the digital network will empower students to tell their own stories on a platform they help create, which will prepare them to thrive when they enter the workforce. Students will be inspired to hold themselves and each other accountable by showcasing their work.
    5. What is not contributing to our goal of preeminence? What is holding us back? Silos are holding us back. The Digital Network will bridge our departments and boost school spirit. We aren’t recruiting the best students because we’re not providing the most cutting-edge learning opportunities.

    3 step launch plan green.jpg

    USF Digital Network Goals

    • Integrate curriculum with content creation
    • More content made by students for students
    • Increased exposure for USF experts
    • Fiber lines and control room for live events
    • Power 5 eligibility for significant funding increase

     Launch Plan Year 1:

    • The USF web team will build a page on the usf.edu content management system that integrates with the MyUSF app.
    • We will curate and embed existing content housed on USF YouTube Channels.
    • Several courses in the mass communications department will create new content specifically for the digital network.
    • Videos will be embedded into channels via an official USF YouTube channel.
    • We will distribute guidelines and style guides for video quality, branding consistency, and publishing workflows.
    • We will inform all content creators of video release and FERPA requirements.
    • We will launch customizable push notifications.

    Launch Plan Year 2:

    • The digital network committee will meet with several app developers to get quotes for building the network on an app.
    • We will develop a plan for live streaming.
    • We will build up to a regularly live streaming network in areas like athletics, graduations, homecoming, etc.
    • We will set up plans for sporting event paywalls.
    • We will post digital ads and create sponsored content opportunities.

    Launch Plan Year 3:

    • We plan to complete fiber installations and control room upgrades so we can technically be equipped to broadcast intercollegiate athletic events.
    • We plan to launch sports broadcasting curriculum and train students to run cameras and direct live athletics events.

    Launch Plan Year 4:

    • We plan to upgrade the WUSF studio, lighting grid and cameras for commercial production.
    • We plan to streamline curriculum so USF students can create high-quality video production in an up-to-date production facility.

    Pros of Creating Digital Network in House 

    • CMS integrates with MyUSF app
    • Simultaneous website and app launch
    • Customizable push notifications
    • YouTube embeds instead of storage
    • Embed workflow is more efficient

    Cons of Creating Digital Network in House

    • Live streaming would require new staff or we partner with outside vendor
    • Building pay walls requires more time
    • Setting up digital ad deals would be more time consuming
    • We would lose a built-in group of advertisers that may come with third-party developers

    Revenue Opportunities

    Intercollegiate Athletics

    If their current conference, the American Athletic Conference were to create a Digital Network, or if USF were to join a conference that already has a Digital Network in place, it is reasonable to believe that the increased conference revenue to USF Athletics could be between one million and twenty million dollars annually.

    Studio Production

    According to Jorge Cunha, WUSF brought in an average of $250,000-$275,000 a year in production revenue over the past 13 years. In addition to contracts with Ashley Furniture, WUSF earned $100,000 off six episodes of “Rays Rookies” production. Video production curriculum can help streamline an efficient and lucrative process so students can get hands-on experience creating videos for clients. This will increase our potential for new revenue streams. Upgrading the studio will also improve academic and revenue opportunities.

    Digital Ads

    In response to our Digital Network plan, Associate General Counsel Joel Londrigan suggested USF could earn digital advertising revenue on the website and app as long as students sign FERPA and video release forms. We can sell online real estate for digital ads like banners, billboards, and pre-roll.

    Sponsored Content

    USF courses that focus on creating video content can collaborate with businesses to produce sponsored content to reinvest in innovative student initiatives like a digital network app. Some sponsored content created by students for students could be:

    • “Cooking in College” by Publix
    • “Freshman 15” by Crunch Gym
    • “Now Hiring” by Glassdoor

    Sponsored Graphics

    In addition to sponsored content, companies can also sponsor graphics like lower thirds and tickers.

    USF TV website mock-up

    Upgrade Investments

    These estimated costs cover production and post-production upgrades for live student-run broadcasts of Athletics events and commercial video production at WUSF, according to Jorge Cunha.

    Total estimated cost: $4,025,000

    Studio & Control Room             $3,450,000
    Edit & Graphics Suites                $100,000
    Fiber                $125,000
    Installation                $275,000
    Links                  $75,000

    Production Control Room
    Estimated cost: $700,000

    1. UHD (4K) production video switcher
      • 3G processing.
      • Two configurable multi-viewers.
      • Four mini ME controls.
      • Ability to deliver outputs to multiple screens, on-set displays and signal distribution systems.
      • Configurable routing sub-system with up to 144 physical inputs/outputs and 2 ME.
      • I/O of up to 144 X 144.
      • Input groups that accept analog and HDMI inputs as well as SDI.
      • Powerful animated transition capabilities with audio playback.
    2. Character generator
      • Graphics with blur, distortion, color correction, chroma keying, drop shadows and wipes.
      • Sequencer.
      • Effects palette.
    3. Monitoring scopes/vector/phase
    4. Video wall
    5. Studio Furniture
      • Custom studio furniture with rack rails.
      • Recessed equipment and wire panels.
      • Accent lighting.
      • Access hatches.
      • Wire egress – Radius.
      • Equipment rack bays with standard EIA tapped mounting rails.
    6. Equipment Racks
      • Mid Atlantic 7-foot equipment racks.
      • Wire management housing.
      • Power strips.
      • Side panels, back doors, blank panels.
      • Grounding.
    7. Cabling/connectors
      • Multi conductor cable.
      • 75 Ohm video cable.
      • Network cable Cat 5E or 6.
      • BNC, XLR, Mini BNC, RJ 45.
      • Testing/labeling.
    8. Servers
    9. Recorders
    10. Embedders
    11. Licensing and support contracts
    12. Audio announcer booth
      • 4X6 audio announcer booth.
      • Avalon microphone processor.
      • Sound soak materials and sound panels.
      • STC 60 or greater studio door.
      • On air light.
      • Neumann U78 or TLM 103 microphone with wind screen.
    13. Audio mixing console
      • Wheatstone 32 channel digital mixing console.
    14. Router
      • 2RU frame with 64X64 HD-BNC I/O and 8 AUX I/O ports.
      • Compliant with SMPTE 259M, 292M, 344M, 424M DVB-ASI and SDTI signals.
      • Ultriscape multiviewer heads use four outputs on the frame.
      • Ultrimix upgrades allow for routing, mixing and processing of all embedded audio inputs.
      • Ability to support up to 512X512 discrete mono audio inputs through the use of the AUX I/O ports.
      • Two power supplies.

    Studio
    Estimated cost: $2,500,000

    1. LED cyc lights
    2. Strand lighting boards
    3. Complete lighting package
    4. Complete grip electrical package
    5. 4 HD studio cameras with pedestal.
    6. Dolly.
    7. Cammate

    Integration: General studio and production control room
    Estimated cost: $250,000

    1. Cabling
    2. Connector count
    3. Installation
    4. Construction
    5. Floor and wall soundproofing
    6. AC, mechanical, heat and load calculations engineering
    7. Electrical and electrical engineering / UPS upgrade
    8. Permitting and design
    9. Documentation and labeling
    10. Training, testing, calibration

    Links
    Estimated cost: $75,000

    1. Links from SunDome to WUSF studios
    2. Links throughout campus
    3. Links for live outside production events

    Edit & Graphics Suites
    Estimated cost: $100,000

    1. Adobe Suite (Premiere Pro, After Effects, Photoshop, InDesign, Illustrator, etc.)
    2. Storage system
    3. Computers

    YouTube Workflow:

    After meeting with Associate General Counsel Joel Londrigan, we developed this workflow to ensure all content follows copyright laws, includes video release forms and FERPA forms:

    • Instructors and digital network liaisons should only upload the best videos after confirming they are free of errors, professionally shot and edited.
    • Anyone uploading videos to USF YouTube accounts should activate the closed captioning option for compliance.
    • Any audio used in videos uploaded to YouTube must be fair use (or legally downloaded from our music library contract “Jingle Punks”).
    • All videos must be 16:9.
    • Video cannot contain gratuitous nudity or profanity.
    • No video should be posted without first confirming video producer submitted signed video release forms for any person featured in the video.
    • Students must also sign FERPA form so we can legally upload their work on YouTube and embed on any USF CMS, like the USF digital network and usf.edu.
    • All videos on YouTube should include search engine optimized headlines.
    • Every YouTube post should include keyword tags. Tags include topics, names of those interviewed, USF department or college featured, and class in which the project was created.
    • YouTube video descriptions should include the name/s of the person or people who created the video and published date.
    • YouTube video description should include the name of the course for which the video was created if applicable.
    • Videos should include short Associated Press style stories in the YouTube description section.
    • Links should be included in the YouTube description to make it easier for viewers to get more info about the USF people/departments in the video. YouTube does not yet recognize hyperlinks, so we should include actual links for their YouTube descriptions.

    YouTube title limit: 100 characters with spaces.
    YouTube video description limit: 4,900 characters with spaces (approx. 800 words).

    Here are some of the YouTube channels affiliated with USF that we may be able to aggregate videos from:

    • USF
    • GoUSFSP
    • Institute for Research in Art-IRA
    • Oracle News Online
    • USF Athletics
    • USF College of Art and Sciences
    • USF College of Engineering
    • USF College of The Arts
    • USF Housing & Residential Education
    • USF Innovative Education
    • USF Marine Science
    • USF Muma College of Business
    • USF Patel College of Global Sustainability
    • USF St. Petersburg
    • USF Bulls Club TV
    • USF Employee Training
    • USF Graduate School
    • USF Health
    • USF Honors College
    • USF Libraries
    • USF New Students
    • USF Orientation
    • USF Pharmacy
    • USF World
    • WUSF
    • Zimmerman School Digital Network at USF

    University of Florida Tour

    On July 21, 2017, the USF digital network team toured the University of Florida’s television/radio stations and sports venues to get a better idea of how the students produce video and live content as part of their courses and volunteering. The UF Athletics team launched a new collaboration with the journalism school about seven years ago.

    https://www.instagram.com/p/BW0buxpl9SK/?taken-by=jeanetteabrahamsen

    UF worked with the company BCI to install the fiber. WJHW consulted with them about audio-visual aid in the athletic venues. WJHW is out of Texas. The University of Florida has 1,200 connection points for fiber on their campus. They suggest adding as many extra lines of fiber as we can (they said Notre Dame has 144 individual pieces of fiber at each one of their venues).

    https://www.instagram.com/p/BW0dCEOFPj4/?taken-by=jeanetteabrahamsen

    UF provides one to three credit pass/fail courses starting at the freshman level. They are all electives related to TV production, live events, news, video and social media. They have seven of these courses. They say that these extra electives have not caused students to go over their credit limit. They found that offering these electives as credit hours reduced the number of no-shows and helped students get experience much sooner.

    https://www.instagram.com/p/BW0w_y8FFIV/?taken-by=jeanetteabrahamsen

    https://www.instagram.com/p/BW0wc_ylk9a/?taken-by=jeanetteabrahamsen

    Software/apps used at UF TV and Athletics:

    • Adobe Premiere Pro to edit videos.
    • News students use ENPS to build and manage newscasts.
    • UF does not use the automation system Ignite, but they are considering it.
    • Splice app for mobile video editing.
    • Slack for planning stories and student pitches.
    • DaPulse for their project management and schedules.
    • Select Tracks for music licenses.
    • WeTransfer to share video files.
    • Studio.Twitter to upload videos and save as draft before posting social content made by students.

    https://www.instagram.com/p/BW0anTTF5yQ/?taken-by=jeanetteabrahamsen

    After the tour, I met with Mira Lowe, director of the Innovative News Center. She oversees all of the news classes for the college of journalism and communications. These classes produce 30-minute newscasts for broadcast on their local PBS affiliate.

    These classes do not produce content for students. Their goal is focusing on their older demo. Few videos make it to the UF app. These videos are not separated in channels and are difficult to find. Most videos are not uploaded to social platforms or YouTube.

    When students do post to social media, the WUFT profiles will retweet or share the best ones, but this is lower on their priority list than the live broadcast.

    I also met Harrison Hove, the multimedia news manager. He teaches one class for the college of journalism and communications. He spends each day in the newsroom with a few other managers/teachers who act as executive producers of the newscasts. Together, they help the students produce the newscasts Mon-Fri.

    Both Harrison and Mira were very open to collaborating with USF and/or airing content created by USF students if we decide to pursue a content share model in the future.

    USF Health Feature Story Ideas

    Here is an example of an inspirational and educational story students can create that they will actually want to watch and share.

    Madison Miller is a 23-year-old cancer survivor who started a non-profit to help young cancer patients.

    TV students can get experience producing content in the field, then they can get studio production experience by producing interview segments at WUSF TV studios.

    USF Health Studio Expert Interviews

    Here is another example of how students can hook viewers with a compelling story, then go more in-depth with health experts in on-set interviews.

    USF Health Research Studies

    USF Health and Moffitt recruit USF students to participate in research studies. TV students could shoot interviews with participants and doctors to explain how the research coming out of USF is changing people’s health around the world.

    Recruiters could use the extra help getting the word out about the studies. And the interviews can spark a more in-depth dialogue about health. It would help educate USF students.

    Long Format Studio Programming

    Here’s an example of a 30-minute health program I produced at WUSF-TV studios in 2009. Students can create in-depth programming about research like the HPV clinic off Fowler.

    USF Medical School Projects

    We could also have a place for USF medical students to present their projects.

    https://www.instagram.com/p/BRn3ShWlWbZ/?taken-by=jeanetteabrahamsen

    https://www.instagram.com/p/BQlDidXBStY/?taken-by=jeanetteabrahamsen

    https://twitter.com/JNetAbrahamsen/status/950466391399911431

  • Lighting Tips and Tutorials

    Lighting Tips and Tutorials

    If you don’t have a lighting kit, you can use natural light to improve the quality of your videos and photos. Pay attention to where light is coming from and the shadows it casts.

    The best light is diffused sunlight. This reduces shadows. You can easily defuse sunlight by placing your interview subject inside with their face toward a window or sliding glass door. Avoid setting up your interview subject with their back to a window unless you can add a ton of light on their face. If you don’t have a lighting kit, I suggest you avoid this all together.

    Take a look at the first photo for an example of a backlit interview. There’s not enough light on my face to fight the light coming in behind me. I could open my camera iris to better see my face, but then I would overexpose the background even more.

    The second photo is taken in the exact same spot. I simply spun around to face the light.

    IMG_8085IMG_8083

    Another error many beginners make is setting up an interview outside in the middle of the day. When the sun is directly above people’s heads, it casts unflattering shadows on their faces like this:

    IMG_8080

    You don’t need a lighting kit to light your interview if you have diffused sunlight. But what about when you’re inside a building with no natural light source? Most light from lamps or light fixtures in offices or homes isn’t strong enough to look great on camera. That’s where lighting kits come in.

    Three-point lighting kits are the most common. They contain a key light, fill light and back light, aka hair light. But I just told you not to backlight your interviews right? For most interviews your key light and fill light should be much stronger than your back light. Most lights give you the option to reduce the strength. Or, you can move your back light farther away from your interview subject to weaken the strength. You want to use back light to softly add depth so your interview subject doesn’t blend into the background. But, your back light should not be so strong that it shoots into your camera lens and degrades the resolution of the person’s face.

    lighting.png

    Your University of South Florida email will get you free access to Lynda.com. Here are some video courses on interview lighting:

    Those go in depth. Here are the most useful videos from those courses:

    Tips:

    • Don’t get burned. Some lights get very hot, very quickly. Wear gloves to stay safe.

    https://twitter.com/JNetAbrahamsen/status/908858556174266368

    Featured Image: Film Set by Alex Lang (CC BY-SA)

  • What’s Wrong With This Picture?

    What’s Wrong With This Picture?

    Mistakes. We all make them. Try to learn from other people’s mistakes so you can avoid repeating them. Small mistakes can ruin a great video. As a producer, I refused to air a package because of a single poorly lit frame or disheveled shirt collar. If you make a mistake while you’re shooting, DON’T include the mistake in your edited video.

    The following videos all have great components, but I would never use them because of a few errors. Let’s watch them and identify mistakes you should avoid in your next video.

    Here are a few lessons from this video:

    • You should pay attention to the backdrop of your interviews. Make sure backgrounds enhance your visual. The background shouldn’t detract or distract. You should especially avoid interviewing more than one person in the same spot if your background looks ugly. Also, remember to pull your interview subjects away from the background. Creating depth will help push the background out of focus so your viewers can’t see all those wrinkles or imperfections behind the person.
    • Use b-roll to transition from one interview to the next. If you’re editing two interviews back to back and the interviews weren’t shot the exact same way, you should make sure they have different backgrounds, different distances, different angles, etc. The dissolve transition at 00:11 looks unprofessional.
    • Use lead room to create negative space in the area where your interview subject is looking. The first interview had decent lead room, but the second interview was centered. Only center an interview if the person in the video is looking into the camera. Most of the time, you’ll want to interview people on the rule of thirds and have them look either left or right of the camera (depending on which side you’re standing on).
    • Is this really the most relevant thumbnail for this video? Make sure you pick relevant and visually compelling images to showcase your videos.

    Here are a few lessons from this video:

    • Better lighting would have dramatically enhanced the quality of the b-roll at the beginning of this video. If you don’t have a lighting kit, use natural light. Instead of shutting the blinds in shots like 00:02, open the blinds and use that sunlight. Just make sure you move the camera so you’re not backlighting.
    • When you cover an interview with b-roll, make sure you use a sequence of at least three clips of b-roll before returning to the interview. The b-roll at 00:11 doesn’t flow that well since the editor immediately returned to the interview video after one clip of b-roll. This looks like you’re just trying to cover a jumpcut. Remember b-roll should enhance your story.
    • Take a look at 1:28. The videographer did not follow the rule of thirds or use lighting. The iris should also be opened more when you shoot people with darker skin tones. Remember that darker skin reflects less light. That means the camera can’t capture as much detail if the videographer doesn’t add light and open the iris.

    Here’s the main lesson from this video:

    • For the most part, this video is pretty well shot. But, I would not post this because of one small, but very important detail. Go to 3:10 and take a look at this poor guy’s shirt collar. Remember to help people out. If someone you’re interviewing has something out of place like a messed up collar, hair sticking up, crooked tie or necklace, fix it!

    Here’s the main lesson from this video:

    • If you’re doing a story about a food truck, immediately show me lots of extreme close-ups of food. Food can be the easiest b-roll because there’s usually texture, depth and color. Get extremely close to the food and make sure there’s lots of light on it.

    Here’s the main lesson from this video:

    • Always check your video before you leave a shoot. If your video is overexposed, reshoot it. It’s very difficult to improve overexposed video. If your camera has a manual iris, make sure it’s at an appropriate size to let in the right amount of life. Don’t backlight your interviews.

    Here are a few lessons from this video:

    • You don’t need to start a video on a person’s face. Try starting with nat pops or sound bites covered by super compelling b-roll. Your first few shots should be the best video from your entire project. Start strong.
    • Use b-roll sequences. Don’t cover an interview with one clip of b-roll and then return to the video. Layer at least three clips of b-roll back to back over the interview sound, then return to the interview video.
    • Avoid using a company’s logo (like at 00:15) unless it’s a beautiful logo and fits naturally into the frame. Those black bars on the side kill me. Make your own graphics if needed (try Canva).
    • Shoot a variety of angles, heights and distances. Where are my extreme close-ups?

    Here are a few lessons from this video:

    • B-roll should generally only last for 3-seconds each. The opening shot was way too long.
    • Don’t backlight people. The shot at 00:25 was too backlit. Instead, use the light to your advantage. Let the light shine on his face, not his back.

    Here are a few lessons from this video:

    • Graphics change quickly. What was considered acceptable a few years ago, isn’t anymore. Be modern, clean, clear. Text should look cool and fit the theme. If you put text on the screen, leave it up long enough for people to read it. Better yet, put less text on the screen. Avoid back-to-back text full screens. Text should enhance the storytelling. It should be concise and important.
    • Headroom and lead room off in most interviews.

    Try to identify errors in the following videos to help you prevent making the same mistakes in the future:

  • Photography & Videography Basics

    Photography & Videography Basics

    Rule of Thirds

    Everyone in TV is expected to understand and follow the rule of thirds in EVERY interview and every b-roll clip. This is IMPORTANT. The good thing is, it’s also super simple if you enable grid bars on your phone or camera. DO NOT shoot without your grids enabled.

    • The rule of thirds means that the important compositional elements or subjects should be along the lines or at the intersections of the lines. 
    • Usually, a person’s eye, nose or the bridge of their nose should be at the upper right or left intersection of the lines. They should look across the screen. This will give them lead room. One of the only times you will intentionally break this rule is if you’re trying to create a negative emotion in your viewers. DON’T do that in this class. That is much more common in film. You will rarely find a reason to break this rule for TV news. If you think you want to try, always shoot two versions. I’ll almost always tell you to go with the version that includes lead room and follows the rule of thirds.

    Not all rules are meant to be followed all the time. But you have to know what the rules are, so you know why and when to break them.

    Framing Overview

    • If you’re conducting and in-person interview, the interview subject should be on either the left or right vertical grid line looking across the screen at the interviewer.
    • If your’e conducting a remote interview like on Zoom, for example, they should be centered looking into the camera.
    • If you’re on camera for a reporter standup, you should look into the camera. If you have a reason to be off centered because you’re demonstrating something, you do not need to be centered. If you’re not actively showing something and you’re just talking to the camera, you should be centered.

    Avoid:

    • Shooting outside when the sun is high in the sky. It creates shadows under people’s eyes and nose.
    • Too much backlight. You will either blow out your background or create a silhouette of your subject.
    • Using a flash for still images.
    • Shooting under a tree when the sun is out. This creates shadows on people’s faces.
    • Placing your subject up against a wall. Create depth by shooting farther away from your background.
    • Too much or too little headroom and lead room.
    • Zooming in while recording video. Use your feet, not your zoom, (unless you’re intentionally trying to create a shallow depth of field).
    • Shooting vertical video (if your’e shooting for TV).

    Tips to Shoot Better:

    • Shoot outside when skies are overcast. The clouds create an even light filter which means no shadows.
    • Shoot in the shadow of a large building. If everything you are shooting is in the shadow, it creates an even light distribution similar to overcast skies.
    • Always think about headroom and lead/nose room.
    • Shooting action is more interesting. Capture moments
    • Get a variety of shots
      • wide (sets the stage)
      • medium
      • close-up
      • extreme close-up (reveals emotion)
    • Get a variety of angles
      • put your camera on the ground
      • hold your camera above your head
      • shoot your subject’s reflection in a window, mirror, puddle, etc.
    • Enable the grid view in iPhone’s camera app to follow your rule of thirds.
    • You should also use grid view in Android phones like Samsung, but you should also hold the phone still for longer than you think when there’s low light.

    Lighting can help you or hurt you depending on how you use it. I took these two pictures while I was sitting in the same seat. Notice what a big difference the lighting makes when I turn slightly. The first picture is way too backlit. The lighting coming from the window behind me forces my camera iris to close so my face is too dark. The second photo uses the lighting to improve the photo quality.

    Interviewing in person & inside

    If you’re interviewing someone in person inside use a window as a source of diffused light. The light must hit their face, not their back.

    In-person interview framing GOOD 4.png
    In-person interview framing BAD 7.png

    Interviewing in person & outside

    If you’re interviewing someone in person outside keep them AND the background in the shade to create even lighting. The main source of light (like the sun) should always hit the person’s face, not their back. Make sure you create lead room or nose room and follow the rule of thirds.

    In-person interview framing GOOD 3.png
    In-person interview framing GOOD.png
    In-person interview framing BAD.png
    In-person interview framing BAD 3.png
    In-person interview framing BAD 2.png
    In-person interview framing BAD 4.png
    In-person interview framing BAD 5.png
    In-person interview framing BAD 6.png

    Interviewing remotely

    Interviewing remote good.png
    Interviewing remote bad 2.png
    Interviewing remote bad.png

    These are examples of acceptable centered reporter standups. They are well-lit and properly framed:

    Screen Shot 2020-12-10 at 4.44.00 PM-1.png
    Screen Shot 2020-12-10 at 4.46.19 PM.png
    Screen Shot 2020-12-10 at 4.48.11 PM.png
    Screen Shot 2020-12-10 at 4.49.18 PM-1.png
    Screen Shot 2020-12-10 at 4.53.12 PM.png

    These are examples of acceptable in-person interviews. They are well-lit and properly framed:


    These are examples of unacceptable shots:

    Do not shoot an interview or standup inside unless you have a lighting kit OR a natural source of light like a large window or glass wall. This lighting is not acceptable. I don’t care what background you’re trying to show. The priority ALWAYS needs to be light on your face or the face of an interview.

    Screen Shot 2020-12-10 at 5.04.32 PM-1.png

    Your interview should NOT be centered and looking off camera. This is unacceptable:

    Screen Shot 2020-12-10 at 5.13.41 PM.png

    NEVER EVER EVER interview two different people in the same exact spot. This makes the interviews feel staged and inauthentic. You should also pull the people you’re interviewing away from the background. The following interview is unacceptable because it’s in the same location as the previous interview, the rule of thirds is not being followed and the person being interviewed is too close to the background.

    Screen Shot 2020-12-10 at 5.16.37 PM.png

    This interview subject should NOT be centered. They should be on the left vertical line, looking across the screen. 

    AVOID vertical images and videos at all costs when making TV. TVs are still horizontal for now. So your content must fill the entire screen. NO black bars EVER. If you absolutely must include a vertical photo or video, you’ll need to think of a creative way to visualize it. You could:

    • record over the shoulder video of the person holding the photo
    • add the vertical photo to a motion array template that matches the mood and style of your video
    • In very rare instances, I might ask you to at “blurred wings” where you zoom into the photo, blur the photo, then add the vertical image on top in Premiere Pro, but this is for emergencies only.

    This interview is not airable because it was not shot properly. There’s no way to rescue this because the sky is way too blown out. The iris was way too open and the interview never should have been set up in front of a bright sky to begin with. The shadows on his face are distracting and the colors look poorly edited.

    This interview is out of focus and not well lit. If you’re shooting with your phone, make sure to tap and hold on the person’s face to lock the focus and exposure before you record. If you’re shooting with a DSLR or ENG camera, zoom all the way in, then focus, then zoom out.

    This interview lighting and focus is unacceptable:

    This reporter should have stepped like 20 feet away from the wall behind her so she’s much closer to the camera and has proper headroom. DO NOT stand so close to walls. This is not acceptable:

    IMG_0546.jpg

    This is unacceptable because the woman’s lav mic cable is showing, she’s in the shadow of a tree, the camera tripod is not eye level and there is improper lead room.

    More tips

    More Examples

    Take a look at the following photos and identify what’s wrong and right about each one.

    photo 2
    There is too much backlight in this photo. It makes it difficult to see the details on the people’s faces. If you have light behind your subject, tap on their faces with your camera phone, or increase the aperture/ISO on your DSLR, or open your iris on your EFP camera. Or just move so that you are not facing the window.
    backlit
    The resolution of this photo is poor because the light coming in the window creates too much backlight. The photo was edited to lighten the woman, but that also means the details in the background were lost and blown out.
    backlight
    Backlight is used intentionally to create a silhouette. There is plenty of lead room and negative space. And the man’s head is in the upper left following the rule of thirds.
    12439220_10156563670210121_2266016789600753324_n
    Backlight is used intentionally to create a silhouette. The sunlight creates solar flares around the boy and illuminates his lightsaber.  The boy’s shadow is intentionally included in the shot. However, this would have been even better if I were farther away from the boy and included his entire shadow. I intentionally did not follow rule of thirds because I like the lines created on either side that point towards the center.
    11866371_10156046081960121_5856099838919267846_n
    This is an example of intentional backlighting creating a silhouette. There’s a little too much headroom.

    I adjusted the shot to frame it more precisely to the rule of thirds:

    Screen Shot 2016-01-23 at 10.59.29 AM.png
    Use negative space intentionally. Lead room should create space in the direction the person is looking.
    12032221_10156194570605121_2187108673596306198_n
    Check out this lead room.
    1002697_10155331635045121_1382343330268754894_n
    Create negative space on the upper left because that is where the baby is looking.
    10434029_10155216997905121_8660938903539310355_n
    Layer your shots. Look for opportunities to create depth and focus. This is taken with an iPhone. Tap the person or item you want to focus on, and it puts the rest out of focus. This has a shallow depth of field. It also has a dark vignette to ensure people focus on the light part of the shot.
    12039615_10156194584400121_8230725930057061889_n
    Frame your shots. Get close.
    12032012_10156189871585121_7841895742523612919_n
    Here’s another way to frame a shot.
    11081221_10156104633355121_6042461143018520302_n
    This has a shallow depth of field. It also shows how effective extreme close-ups can be. Also note the height and angle. The camera is nearly touching the table, pointing in an upward direction. This also has vignette.
    11209678_10156163632115121_5529001076168746451_n
    This has a shallow depth of field. The flower in focus is an extreme close-up.
    12019978_10156167347125121_9144979627679459464_n
    Extreme close-ups and a creative angle makes a huge difference. Remember to get close to people and things you’re shooting.
    10401580_10156458561200121_8971519485885238494_n
    Get close. Use extreme close-ups often.
    12032077_10156168755460121_3607410369383179147_n
    The right angle tells a better story and looks more interesting. Angles also help create shallow depth of field. If this photo were taken from standing up several feet away, it would not create the same effect. A shallow depth of field gives photographers power to control what people focus on.
    12037966_10156172573130121_5875846750858875152_n
    This is a reflection shot. The sun is setting in the reflection of the man’s sunglasses. Remember to look at things differently. A sunset is great, but it’s more interesting when you see it through someone else’s eyes.
    12009770_10156172809245121_6926945267821859546_n
    Lead room & reflection shot. Notice your subject’s headroom should get smaller as you get closer to them.
    12042712_10156179467135121_8516245824764207404_n
    Angles make all the difference
    12029561_10156203334715121_7560048281234986793_o
    The camera is touching the ground looking up because it fits with the overall emotion of the photo. Your angle and height should match the feeling. In the same way that an extreme close-up would evoke emotion, this wide shot and the angle evoke power, and plays on the over the top comic scene.
    10671496_10156291507170121_8218493165544766983_n
    Your viewers become more immersed in a scene when you include shots from behind or over the shoulder.
    Editing Apps
    • Instagram
    • Adobe Premiere (video)
    • Adobe Photoshop (images)
    • Snapseed
    • iPiccy

    It’s easy to make good pictures better with simple edit tricks:

    Before:

    img_6816

    After:

    When editing becomes unethical

    The picture we just looked at is clearly improved after adding a few effects. But when can edits be unethical? The following video discusses the controversy surrounding one editor’s decision to darken O.J. Simpson’s face on the cover of TIME magazine.


    Here are more photos from Instagram to inspire you to use different angles and lighting techniques:

    cool pic
    10258483_10155803354390121_2472392935970798802_n
    violin
    lead room
    254563_10152210250035121_1812214272_n
    382083_10152295749130121_137717861_n
    533982_10152323665170121_1960565898_n (1)
    154674_10152323666885121_780552787_n
    427109_10152904467615121_202147795_n

    Photojournalism

    Once you learn the basics of photo composition, you can really start to tell stories. When you use photos or video for storytelling, make sure your framing and lighting help you tell an emotional story.

    Get inspired by taking a quick free course on Poynter’s News University website called “Best of Photojournalism: What Makes a Winner.”


    5 Tips To Keep In Mind Before Your Next Shoot

    Al Tompkins created this video with examples of good lighting and better video. This video is from a few years back so ignore 5:40-6:06. 16:9 is now the industry standard.

    I encourage to you refer back to his tips before your next shoot:

    1. Put the camera on the shadow side of the subject you’re shooting.
    2. Use steady sequenced video. Stop panning and zooming!
    3. Pay attention to natural sound and keep your headphones on.
    4. Pay attention to framing. Smaller screens need close ups.
    5. Work closer to your subject. Zoom with your feet, not your lens.

    While you watch any video (TV, film, ads, etc.) pay attention to each photography technique:


    Don’t forget audio

    • Natural sound (nats) help immerse your audience in your environment. Listen to your surroundings.
    • Always wear headphones to hear what your mic hears.

    Watch and learn. Follow Storytellers on Facebook:

    Screen Shot 2016-01-24 at 1.09.49 PM.png

    You can also check out some inspiring work on their YouTube channel TV News Storytellers.


    Get Involved & Get Inspired

    The National Press Photographers Association has a great website with lots of beautiful photography examples.

    Connect with Bob Dotson. He’s been an NBC correspondent for four decades. You can watch many of his stories in the “Make It Memorable” section of NBC Learn.

  • WordPress For Broadcast News Class

    WordPress For Broadcast News Class

    If you’re new to WordPress check out some helpful beginner guides.

    Students at the University of South Florida have free access to Lynda tutorials. Just log in with your student email and search WordPress Essential Training.

    Posting your assignments on WordPress

    Go to WordPress.com and sign in using the email you used when you were invited to join the USF Broadcast News Group.

    Click the Screen Shot 2015-09-11 at 5.24.10 PM button in the top left of your screen that takes you to sites affiliated with your email. You will see two different views as WordPress rolls out its new format, the black or blue background.

    If your screen is black:
    1. Scroll down under “posts” and click on “add new.”
      Screen Shot 2015-09-11 at 5.28.32 PM
    2.  Then you’ll see category options on the right that correspond to each class project.
    3. Click the little box next to the project you are turning in.Screen Shot 2015-09-11 at 5.26.56 PM
    4. Paste your YouTube link into the body, it will then embed into your post.
    5. Add your text (script and/or web text).
    6. Then click publish. Always test your link in a new tab.
    7. Submit the link in canvas. Remember to submit the link to the finished post, not to your account. If you submit the link to your account, you will get points off.

    If your screen is white and blue:

    1. Click “add” next to “blog post.”
      Screen Shot 2015-09-11 at 5.36.29 PM
    2. Then look down on the left under “categories.” When you click there, you will notice several different assignments for other USF professors. Makes sure to only click on the assignment name that has “Abrahamsen” in the title.
      Screen Shot 2015-09-11 at 5.37.20 PM
    3. After you’ve added your media and text, click “publish” then submit that link in the assignment on Canvas. Remember to submit the link to the finished post, not to your account. If you submit the link to your account, you will get points off.

    Embed instead of upload

    Embed your social media, videos, pictures, gifs and memes to increase your engagement.

    Embedding is becoming a helpful tool to source your content. If you’re posting someone else’s tweet, for example, others can easily click on their handle to learn more about this person. This also helps your credibility. If you were the one who took the picture or made the meme, don’t you want credit too? By first posting your pictures on Instagram or Facebook, you will be able to embed media with links to your other platforms.

    When you embed media, the content will constantly update the number or views, shares, retweets, etc. This is much better than just uploading a screengrab that will be out-of-date the moment you post it.

    Embedding ties all of your social platforms together. It improves your chances of increasing your analytics. Many media companies these days will use analytics to determine if you get hired, and how much they will pay you. So start building those numbers up now.  If you upload when you should embed, you will also lose points on your assignments.

    WordPress is constantly updating and making it easier to embed, so make sure you use the most recent tutorials because there are lots of outdated ones online.

    The WP Beginner YouTube channel offers great tutorials to enhance your WordPress posts, pages, and sites.

    Here’s an example of what a YouTube video looks like when it’s embedded on WordPress:

    Here’s an example of an embedded tweet:

    Links

    Hyperlinking is a great way to drive engagement and add value for your readers. But don’t send your readers away to other people’s sites. I always suggest clicking the box that opens a new window when your reader clicks on a link on your page or post.

    1. Click the link button at the top of  your page or post when you’re in edit mode:wordpress link.PNG
    2. Then, check the box you see here that says “open link in new window/tab.” Then click “add link.”wordpress open link in new window.PNG
    3. You can also hyperlink the websites by highlighting a keyword in your page/post or you can adjust the “link text” in the window above.

    Jump links

    When you create longer blog posts or pages, you may want to include a menu or table of contents at the top so your readers don’t have to scroll through lots of text to find what they’re looking for. That’s called a jump link. Read this helpful step-by-step guide to adding a tiny bit of HTML code into your WordPress site to make your posts and pages more user-friendly.

    WordPress Tutorials

    Before you watch a tutorial, it’s important that you understand if you’re using WordPress.com or WordPress.org. Some tutorials are only relevant to one of those. For a quick rundown of the differences, check out this article on DIY Themes.

    Here’s a great rundown of how to embed audio into your post.

    WordPress has many video tutorials to improve your posts, pages, and sites.

  • Lead Writing For Broadcast News

    Lead Writing For Broadcast News

    Don’t feel like reading this lecture? Click here for a video of me explaining lead writing. 

    What is a lead?

    • The first sentence of your story
    • The best opportunity to grab a viewer’s attention
    • Similar to a headline
    The most important thing to keep in mind when writing your lead is that it must be clear and easy to understand.

    3 ingredients of a well-written lead

    1. Capture the essence of the story. What’s the point?
    2. Conversational writing. The anchor sounds like they’re speaking with someone, rather than reading a script at them.
    3. Most important facts of the story presented in a narrative. Remember how impact and emotion drive good storytelling.

    The art of the lead

    • Use clear and powerful statements so viewers know why they should care.
    • Always understand how your story affects viewers before writing your lead.
    • Active writing.
    • New, Now, Next.
    • Mom rule: write the way you’d talk to your mom.

    What makes something newsworthy?

    Ask yourself:
    • Does this story affect people?
    • How many people does it affect?
    • How long will the story affect people?
    • Does it have legs?

    Determining what’s new, now, next:

    • Who are the participants in the story?
    • What are they doing right now? (or at the time that the newscast airs)
    • What will they be doing next?
    Avoid:
    • Using a person’s name in the lead line, unless that person is known to every viewer.
    • Using too many facts or numbers in your lead line.
    • Assuming the viewers know what you’re talking about.
    • Passive writing.
    • Past tense.
    • Long sentences.
    Example of a poorly written lead:
    Twenty- nine- year- old Matt Thomas was arrested for the shooting death of eighty- nine- year- old Mary Smith near the Chase Bank on 4505 East Fletcher Avenue at eleven A-M.
    Example of a better lead:
    A FAMILY IS DEVASTATED THIS EVENING AFTER AN ELDERLY WOMAN WAS SHOT TO DEATH IN BROAD DAYLIGHT.
    THE MAN ACCUSED OF KILLING EIGHTY- NINE- YEAR- OLD MARY SMITH IS NOW UNDER ARREST.
    Note: it’s difficult to follow every “rule.” By trying to use “new, now, next,” parts of this is passive. I also felt her age was more important than writing in active voice in the second sentence. If I want to make the second sentence active I could write it like this, but then it would be past tense:
    POLICE ARRESTED THE MAN ACCUSED OF KILLING EIGHTY- NINE- YEAR- OLD MARY SMITH.

    See more examples in chapter 3 of the “Broadcast News Handbook.”

    Connecting with your viewer in your lead

    By understanding how a viewer is affected by your story, you can re-word your lead like these examples:

    • YOU MAY WANT TO INVEST IN SOME RAIN BOOTS BECAUSE IT’S EXPECTED TO FLOOD THIS WEEKEND.
    • IF YOU HAVEN’T BOUGHT ALL OF YOUR CHRISTMAS PRESENTS YET, TIME IS RUNNING OUT.
    • HAVE PLANS THIS WEEKEND? YOU MAY WANT TO CHANGE THEM ONCE YOU HEAR HOW MUCH RAIN IS HEADED YOUR WAY.

    Rule of Thirds

    We write for the ear. That means viewers don’t get a chance to go back and read what your script says. That’s why you should limit the number of items in a script to three.

    Example script:
    APPLE ADDICTS ARE GONG TO NEED SIRI’S HELP FILLING THEIR TIME UNTIL NEW GADGETS ARE RELEASED.
    {TAKE VO}
    A NEW I-PHONE IS JUST ONE OF THE INNOVATIONS EXPECTED AT TOMORROW’S BIG ANNOUNCEMENT.
    RUMORS ARE SWIRLING ONLINE ABOUT A HUGE I-PAD.
    PLUS, APPLE’S C-E-O PROMISES THAT VOICE ACTIVATED APPLE T-V WILL CHANGE THE FUTURE OF TELEVISION.

    Even though there were dozens of features I could have chosen to inform viewers about, I chose the three most important ones:

    1. iPhone
    2. iPad
    3. Apple TV

    RTDNA posted a great list of examples to keep your writing tight and accurate:  http://rtdna.org/article/writing_tip_avoid_unneeded_modifiers

    Lead writing example

    Write a good lead for the following story

    The Miami Dolphins lost in a 41-14 blowout against the Buffalo Bills on Sunday, but that was the least of cornerback Brent Grimes‘ worries.

    According to Adam Beasley of the Miami Herald, Grimes’ wife, Miko, was “arrested on charges of battery on a police officer” and“resisting arrest with violence.” She “also faces a charge of disorderly conduct, per Miami-Dade PD, the arresting agency,” Beasley reported.

    “Police say Miko Grimes broke through a police barricade and entered [a] restricted area, head-butted an officer & shouted obscenities,”reported WPLG Local 10 News.

    CNN provided video of the incident, which appears to show Miko Grimes being held down by police officers in the parking lot of Sun Life Stadium.

    This is not the first time Miko Grimes has made headlines. Per Jason Lisk of the Big Lead, Grimes went on a Twitter rant aimed at the NFL in January. After she had emergency oral surgery, her husband asked head coach Jason Garrett for permission to leave the Pro Bowl. However, according to Lisk, someone else in the NFL apparently “pulled his paid appearances when he missed practice.”

    This apparently sparked Miko Grimes’ commentary on a variety of topics regarding the NFL, including the league’s issues with domestic violence, Thursday night games, concussion concerns and franchise tags. Lisk pointed out the Twitter rant was “at 40 tweets and counting.”

    The arrest comes as Brent Grimes and his team begin to prepare for a Week 4 showdown with the New York Jets.

    COMMON ANSWER:

    Miami Dolphins cornerback Brent Grimes’ wife head-butts a police officer and yells obscenities. Miko Grimes is facing charges of both resisting arrest and disorderly conduct.

    PROBLEMS:
    • This is written like a headline, instead of a broadcast lead.
    • It should be in capital letters.
    • Including the name “Brent Grimes” in the 1st sentence because it makes it wordy.
    • If the person’s name isn’t known be the average viewer, you should use their title in the first sentence, then their name in the second.
    • When a person’s name ends in “s” it sounds weird to read it out loud with an apostrophe after the name. Try reading “Grimes’ wife” out loud.
    I suggest something like this:

    THE WIFE OF A MIAMI DOLPHINS PLAYER IS UNDER ARREST FOR HEAD- BUTTING A POLICE OFFICER DURING A GAME.
    MIKO GRIMES IS ACCUSED OF BREAKING THROUGH A POLICE BARRICADE BEFORE OFFICERS PINNED HER DOWN IN THE SUN LIFE STADIUM PARKING LOT.

    (Note: also remember to put each sentence on its own line.)

    WHAT’S THE DIFFERENCE BETWEEN A HEADLINE AND A LEAD?

    Example:

    Headline: Wife of Miami Dolphins player breaks through police barricade to headbutt an officer and is arrested on multiple charges.

    Lead: THE WIFE OF A MIAMI DOLPHINS PLAYER IS UNDER ARREST AFTER BREAKING THROUGH A POLICE BARRICADE AND HEAD-BUTTING AN OFFICER.

    Note: If you make it new, now, next, you can turn a headline, into a conversational broadcast news lead.
    Example:

    Headline: Football player’s wife arrested for headbutting officer.

    Lead: A FOOTBALL PLAYER’S WIFE IS UNDER ARREST FOR HEAD-BUTTING AN OFFICER.

  • Making Audio Visible

    Making Audio Visible

    Sound is considered an invisible medium. It’s tragic when storytellers ignore how powerful audio can be. Sound is incredibly vital to storytelling. A piece with great sound builds an environment where viewers and listeners can truly be immersed in the essence of the story.

    Anyone in media should always listen for sound.

    • If you’re a reporter or videographer, you must shoot with your ears. Listen to your surroundings and record that audio for a completely immersive experience.
    • If you’re an editor, look for opportunities to include sound anywhere. Silence is also just as powerful as sound, if it is intentional.
    • If you’re a producer, include as many nat pops in your newscast as possible. It will change the way your show feels and how much your viewers are affected by your stories.

    Nat = Natural sound

    One simple example of a story that uses nat pops would be a package on cooking that would start with 3-5 seconds of sound at the beginning. The story could begin with 3-5 seconds of food frying or a cook’s knife chopping food on a cutting board. This nat pop sets the scene so people are transported to a kitchen. Then throughout the story, an editor can include several more pauses between the interview SOTs and include more pops of natural cooking sounds.

    Examples of nat pops:
    • The sound of snow crushing underneath feet
    • The sound of waves breaking on a beach
    • The sound of a person crying
    • The sound of a person laughing
    • The sound of a car horn beeping
    • The sound of rain hitting the ground

    Characteristics of audio journalism

    • Presence: the credibility of being at a location
    • Emotion: tone of voice, intonation, pauses
    • Atmosphere: nat sound

    Immerse your viewers

    Anthony Bourdain is one of my favorite writers ever. He’s a famous chef and book author. He’s an incredible nonfiction writer who immerses people in an atmosphere. His words are beautifully crafted to help you feel, smell and taste different environments as he travels the world.

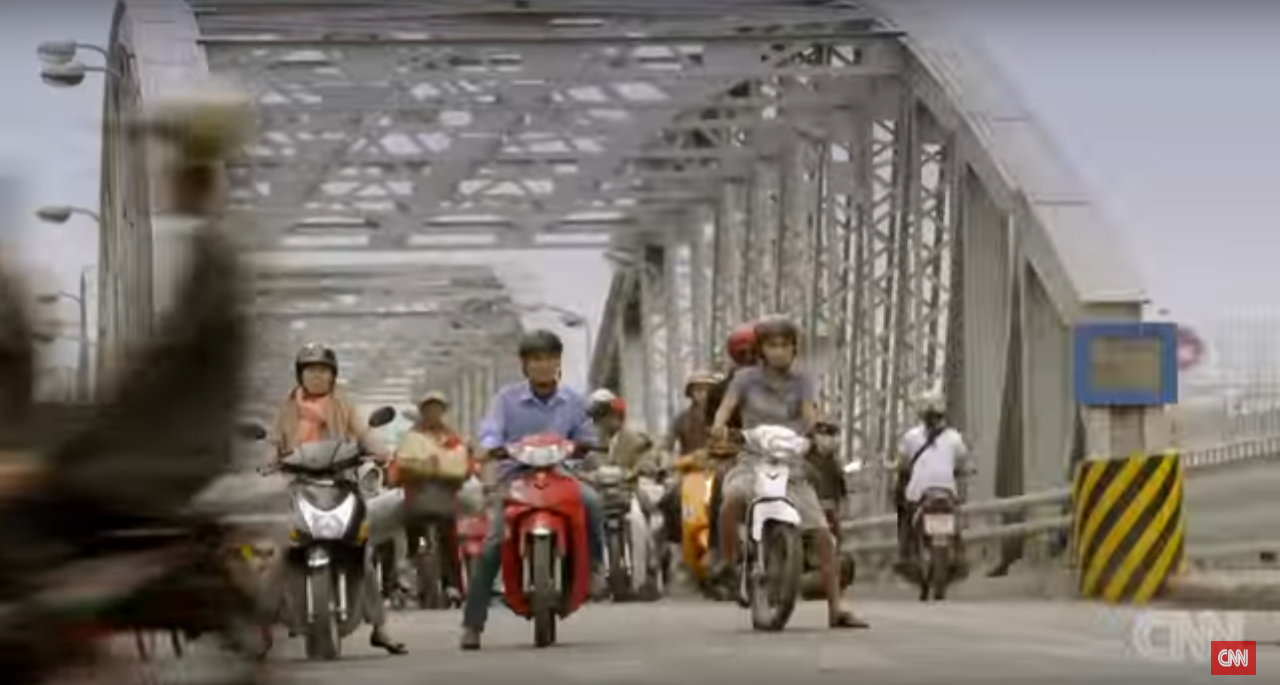
    Bourdain created several great shows I highly suggest you watch. His most recent project with his award-winning production company, Zero Point Zero, is his CNN show “Parts Unknown.” Watch a clip from the Vietnam episode and pay attention to Bourdain’s writing. Also, listen to the natural sound that enhances the audio experience. You don’t really even need to watch the show to feel like you’re a part of Bourdain’s trip because you can close your eyes and feel it.

    We will watch season 8, episode 1 of “Parts Unknown” in class. As you watch the President Obama episode, pay attention to how the editor used instruments to mimic the sound of the rain and music to set the mood. Also, listen to the questions Bourdain asks Obama. Envision the editor’s timeline. How many natural sounds did the editor layer, like roosters, crickets, music, drums, motorbikes, etc.?

    The Washington Post wrote an interesting article about how Bourdain’s storytelling style is changing CNN.

    Radio journalists generally do a much better job of using sound to tell stories than TV journalists. If TV journalists learn from radio and incorporate more sound into their storytelling, they can deliver a much more powerful product to viewers.

    “This American Life” won a Peabody for how they portrayed the economic crisis. Listen to this link to hear how they used sound to evoke emotion.

    Audio isn’t only used to enhance a TV broadcast, it is also an important tool to tie the platforms together. Nowadays, TV stations don’t only rely on broadcasts. They must also have websites, mobile apps, social media accounts, and YouTube channels. All of those are different platforms for a company to showcase their brand. Audio can also be used on all of those platforms in:

    • Reporter overviews: a reporter track of their story that often accompanies articles
    • Podcast: audio episodes on specific topics
    • Audio slideshows: a powerful way to add audio to photo slideshows
    • Breaking News: audio is a faster way to post news updates, the file sizes are also smaller and easier to post. Utterli is a free service for reporters to file audio from anywhere using a cell phone.

    Basic ingredients

    • Interviews and voice-overs
    • Nat sound
    • Music

    Audio recorders

    Cell phones are convenient tools to record sound. You can use the earphone mic to eliminate some ambient sound. Or you can plug in a lav mic and record on your phone.

    You can also buy a small digital audio recorder. You can use these just for posting audio, or to improve audio recording when shooting with cameras like DSLR.

    Here’s an example of how sound can be used to make an open better:

    Audio in the form of music, sound effects, and interviews helps break up the anchor track to grab people’s attention.

  • Telling Stories With Video

    Telling Stories With Video

    Though expensive equipment and training can improve the quality of video and audio, the most important ingredient is the story. Innovation in digital video opened up endless possibilities for everyday people to tell stories and share them on platforms like YouTube. This changed the business of television because viewers are now willing to watch shaky cell phone video.

    The expectation for production quality generally decreases as the expectation for quantity goes up. This does not mean sloppy work will be acceptable because the competition is also increasing.

    You must be better and faster than media professionals in the past.

    What does this mean for you?

    1. You will likely not get a week to shoot and craft a compelling 1-minute 30-second video.
    2. You will be required to turn more stories in less time. Oftentimes several stories in one day.
    3. You will also likely have to do it all by yourself. That means you’re now a:
      • photographer
      • videographer
      • writer
      • reporter
      • editor
      • social media expert
      • producer
      • web producer

    No matter what your professional goals are, you must embrace and learn all of these skills. It will make storytelling more fulfilling, and also ensure you’re more likely to get and keep a job.

    TV terms to know:
    • One-man band
    • VJ (video journalist)
    • Backpack journalist
    • MMJ (multi-media journalist)

    These are all terms used for a professional who works as a reporter, videographer and editor all at once.

    Visual journalism is about telling compelling stories that connect an audience with subjects, people and issues

    Examples of different types of visual storytelling:

    Uploaded on Jul 5, 2007 David Pogue of The New York Times ditches his old cellphone for the iPhone in this sing-a-long sequel.

    Technology columnist David Pogue is featured in ch. 8 of your readings as an example of a storyteller who uses extensive production to get his message across. You can see this video took a lot of time to plan, shoot and edit.

    Meanwhile, Walter Mossberg shows us how viewers forgive the production quality because they are getting used to video that looks like it was shot from a webcam.


    Published on Jan 30, 2013 The BlackBerry has been reinvented to join the mix of today’s touch smart phones. Walt Mossberg gives us his take on the new BlackBerry OS, and five important things you should know about RIM’s new phones. (Photo: Research In Motion)

    You can see he uses a pre-produced open and b-roll. There is also a Wall Street Journal bug or watermark in the right bottom corner. He also uses sounds that go along with his lower thirds to list his advice. But overall, the production is clearly much more simple than Pogue’s video.

    How to shoot faster and better

    Plan ahead

    Think about what you are about to shoot before you begin. Imagine which shots could help you tell your stories and plan differently depending on the gear you’re using.

    • Example: If you’re doing a story on a guy who rides dirtbikes. Bring a gopro and some gaffers tape so you can tape a camera on a bike and get a creative angle.
    • Example: If you’re doing a story on a swimmer bring a waterproof camera to get shots underwater.
    • Example: If you’re shooting outside on a windy day, bring a fluffy windscreen for your microphone to eliminate the sound wind makes when it hits your mic.
    • Example: If you’re featuring a location, put your camera on your dash and record the drive there as the establishing shot.

    If you get a job at a TV station, your employer may provide some of this equipment already. However, don’t be afraid to ask your coworkers because many people who work in TV also own different gadgets that they’d be happy to loan you.

    Storyboard

    Visual sketch of the story to plan your shots

    • A-roll: interviews and demonstrations
    • B-roll: environmental footage added after the a-roll is laid down on a timeline

    Mix your shots

    Build a five-shot sequence

    Example:

    1. Wide/Establishing
    2. Medium shot
    3. Close-up
    4. Extreme close-up
    5. Over-the-shoulder (OTS)

    There are several examples in your book. Poynter also posted an in-depth breakdown of five-shot sequences and examples on how to vary shots.

    Voice-over

    When creating a package (abbreviated as “pkg” in newsrooms) you will need to understand voice-overs. You cannot always control everything that you get out of an interview. That’s where voice-overs come in.

    After you conduct your interview, pick the best sound bites that:

    • Express emotion. Like tears, laughter, sadness, regret, etc.
    • Tell a story. There needs to be a beginning, middle and end.
    • Reveal some aspect of the person you’re interviewing. Viewers are drawn to the person in a story more than the facts, so get personal.
    • Say something you can’t with voice over. A witness, friend, relative, etc. has a different viewpoint than you do as the reporter. The story is personal for them so pick the sound bites that don’t just give you a timeline of the story. Pick a sound bite that gives you context and depth.

    After you put your sound bites in the order you think tells the best story, fill in the blanks with voice-over. Write your script around the sound bites to give the story whatever element is missing from the sound bites alone. Tell a story with your script.

    Watch and learn

    One of the best ways to learn how to be a visual storyteller is to watch other people’s work and learn from them. Perhaps you’ll see things you want to try, or things you want to avoid.

    I suggest the Facebook group StoryTellers.

    Here’s an example of a package shared on StoryTellers:

    Your book lists these suggestions:

  • Digital Workers: Intro To Mobile Journalism

    Digital Workers: Intro To Mobile Journalism

    Journalism Next Chapter 1

    ch1quote.png

    -Richard Gingras
    Head of news product at Google

    How do you prepare for a job that doesn’t exist yet?

    • Never stop learning. School won’t teach you everything you’ll ever need to know. It will teach you how to teach yourself more efficiently for the rest of your life.
    • Constantly have new ideas ready to go so you’re prepared for opportunities.
    • Build learning into your day:
      • Push notifications
      • Email subscriptions
      • Bookmark your favorite sites
      • Listen to radio news

    Mobile Impact on Mass Communications

    How do I get my news?

    • Push notifications from USA Today, CNN and local news apps
    • I scan through news and trending stories on my BuzzFeed App
    • I watch HLN on my iPad with my Verizon app while I cook/clean/get ready for work. I use a waterproof bluetooth speaker in the shower
    • I listen to news from CNN and HLN on the TuneIn Radio app on my phone while I drive or go to the gym
    • I listen to NPR’s news update on their app while I drive
    • My family and friends share stories on Facebook
    • I stream newscasts from local news station apps on my phone
    • If I want to read an article but don’t have time, I paste the text into a free text-to-speech site. The site reads the article to me while I run errands and clean up around the house.

    Here are a few good sites I suggest you check out:

    • Mashable
    • BuzzFeed
    • Wired
    • Cnet
    • NetNewsCheck

    For a longer list of my favorite news sites check out this post on where to find credible, breaking, and viral news.

    RSS: Really Simple Syndication

    Subscribe to information feed that delivers news directly to one place to save time.

    Chrome RSS Feed Reader

    chromerss.png

    chromerss2.png

    FTP: File Transfer Protocol

    • Used everyday by news organizations to transfer large video files quickly either inside the organization or to share with other stations.
    • Reporters can FTP video from the field to get it back to the station.
    • An affiliate across the country can FTP video to share with other affiliates.
    • Used to upload Web pages onto servers to publish sites online.

    FTP.PNG
    Here’s an example of the FTP used by Media General stations to share video and scripts.

    Mobile newsgathering and sharing

    There are many video editing, storytelling, and social media apps that help you create and share stories faster. Videolicious is one easy app I highly suggest trying out.

    Bonded Cellular

    Another incredible transformation in TV is bonded cellular. Companies like LiveU and TVU now allow videographers to live stream from practically anywhere without expensive and cumbersome live trucks. These are most commonly used as a small backpack a videographer now wears. It works like a really strong cell phone signal and also connects to wifi. It’s wireless which means no more running cable. And you don’t have to worry about powerlines interfering with your live truck dish.

    I used LiveU in San Diego to cover events and breaking news that would normally be incredibly difficult to get close to and get out of. Breaking wildfires were now just feet away from my crew. We even did an entire live broadcast from the middle of Comic-Con using LiveU’s amplifier.

    Here’s a short video about the LiveU many of you will use if you work in broadcast news:

    TVU is similar, but there are some small differences. Here’s a quick tutorial on how to use it:

    Selfie Journalism And The Future Of News

    Yusuf Omar is one of the leaders in the selfie journalism revolution. As the Mobile Editor at the Hindustan Times, Omar is building the world’s largest mobile journalism team. He’s training journalists to create faster content using mobile devices. But more importantly, he’s using mobile devices to tell grassroots stories that otherwise wouldn’t make it to mainstream media.

    In 2016, Omar won the world’s first Snapchat awards for giving a voice to sex abuse survivors. His use of social media and new technology is an inspiration to up and coming journalists. It’s cheaper, faster and desperately needed content.

    Please watch this News Xchange discussion about the future of news. Omar explained how he curates social content to tell stories in a more democratic way. Traditional journalists challenged Omar in the discussion portion after his talk. As a journalist who’s worked for both traditional newspaper and television news in America, I understand where the old guys are coming from. But I think it’s time we recognize the cracks that are deepening in traditional news workflow.

    I am not alone in longing for the days when journalists actually had time to research and create valuable content. At the end of the day, news companies are businesses, so it appears journalists will continue to grind out a higher quantity and I fear the quality will inevitably suffer irreparably. So let’s listen to Omar, because he may hold the only key to maintaining the journalistic ethics we’re all clinging to.

    What makes a good story?

    • Evokes emotion, makes you feel something
    • Enlightens
    • Creates empathy
    • Teaches something
    • Inspires action
    • Exposes corruption
    • Warns people about dangers
    • Entertains

    Examples:

    1. Pay attention to how audio and emotion brings this story to life: http://wfla.com/2015/06/30/video-of-homeless-sarasota-man-playing-piano-is-going-viral/
    2. The story had legs, so we continued to follow this homeless man’s journey. His stories became uplifting and inspiring messages for the community, and also went viral nationally. Think about the affect your video has on your viewer: http://wfla.com/2016/05/10/homeless-piano-man-gets-recording-contract-asks-jimmy-fallon-for-a-duet/
    3. If you let raw emotion breathe, you can inspire viewers to feel compassion and driven to help others: http://wfla.com/2015/08/08/outpouring-of-support-for-flooded-out-pasco-war-veteran/

    Storytelling in the digital age

    Storytellers have the power to create environments in which people help each other.

    • GoFundMe
    • Facebook pages to raise awareness

    Related videos:

  • TV News Story Forms

    TV News Story Forms

    Do you love listening to my voice? Or maybe you just want to listen to me talk about this lecture. Click here to watch the lecture I gave in class.

    We will get into a wide variety of story forms in the producing lecture. But first, it’s important to understand the basic ingredients of a newscast.

    5 basic story forms:

    1. Readers (RDR)
    2. Voice-overs (VO)
    3. Voice-over to sound on tape (VO/SOT or VO/SOTVO)
    4. Reporter packages (PKG)
    5. Donuts

    Readers

    If a story involves no video or other visual over the face of the anchor, then it’s called a reader. Sometimes, the viewers can see the anchor’s face for the duration of a story and also see a graphic over the shoulder (OTS). That story would still qualify as a reader because the viewers see the anchor for the entire story. Readers are usually 15-20 seconds. Scripts should be single spaced. Each sentence should be on its own line.

    reader

     VO’s

    A voice-over is any story that’s read by the anchor and also incorporates video, a full-screen graphic, or some other visual. The term “voice-over” simply indicates that the anchor’s voice is heard “over” some visual. Usually 20-seconds. Scripts should be single spaced. Each sentence should be on its own line.

    vo

    {1-3 WORD SLUG GOES HERE}
    {1SHOT}
    {ANCHOR NAME}
    THE LEAD LINE GOES HERE IN CAPITAL LETTERS WITH IMPACT, EMOTION, AND NEW/NOW/NEXT.
    {TAKE VO}
    {EDITOR NOTE: include the slug of the raw video file}
    WRITE TO YOUR VIDEO STARTING HERE.
    DON’T FORGET CONTEXT.
    EACH SENTENCE MUST BE ON ITS OWN LINE IN CAPITAL LETTERS.
    KEEP YOUR SENTENCES SHORT AND CONCISE.
    EACH SENTENCE SHOULD HAVE AN INTERESTING NUGGET OF INFO.
    WRITE FOR THE EAR.
    SCRIPT SHOULD BE TWENTY SECONDS LONG.

    VO/SOT or VO/SOTVO

    This is usually 40-45 seconds. The video is followed by sound. More commonly the SOT will be followed by continued VO. Scripts should be single spaced. Each sentence should be on its own line.

    vosotvo

    A VOSOT is usually written as a VOSOTVO, with continued VO after the SOT. A traditional format you are free to follow looks like this:

    {1-3 WORD SLUG GOES HERE}
    {1SHOT}
    {ANCHOR NAME}
    THE LEAD LINE GOES HERE IN CAPITAL LETTERS.
    LEAD WITH IMPACT, EMOTION, AND NEW/NOW/NEXT.
    {TAKE VO}
    {EDITOR NOTE: include the slug of the raw video file}
    THE BODY OF YOUR SCRIPT GOES HERE, USUALLY THREE TO FIVE SENTENCES.
    KEEP YOUR SENTENCES CONCISE AND WRITE FOR THE EAR.
    EACH SENTENCE MUST BE ON ITS OWN LINE IN CAPITAL LETTERS.
    {TAKE SOT}
    {EDITOR NOTE: include the slug of the raw video file}
    <time codes from raw video in minutes and seconds like this: 00:00. First and last name, title of person interviewed “write word for word the sound from the interview here in lowercase letters.”>
    TRT: write the SOT total run time in minutes and seconds here.
    {CONT VO}
    {EDITOR NOTE: include the slug of the raw video file}
    {ANCHOR NAME}
    WRITE YOUR ENDING HERE TO WRAP UP THE STORY AND/OR PUSH AHEAD.

    PKG

    This is usually 1:30. It traditionally includes several sound bites and nat pops plus a reporter track. The reporter usually also does a bridge stand-up in the middle of the pkg. Sometimes you will make a looklive PKG where the reporter looks live. That means there will be standups at the beginning and the end of the pkg. A shorter version of a PKG can be around 50-seconds. That’s called a whip. You can also air a “tracked VOSOT” which is very similar but usually much more simple and around 45-seconds.

    pkg

    There are many different package styles. You can choose to start your package with a SOT, a looklive stand-up, or you can track your script, but either way you should clearly write the instructions in the editor note so they know exactly what you’re trying to create. Your scripts should be single spaced. Each sentence and command should be on its own line. Here’s an example of a traditional format, you can move the SOT placements around depending on your style:

    {1-3 WORD SLUG GOES HERE}
    {PKG}
    {SOT}
    {EDITOR NOTE:  slug/name of the raw video file here}
    <In and out time codes from raw unedited video clip in minutes and seconds like this: 00:00-00:00 First and last name, title of person interviewed (unless it’s a nat pop) “write word for word the sound from the interview here in lowercase letters.”>
    TRT: write the SOT total run time in minutes and seconds here 00:00.
    {EDITOR NOTE:  include the slug/name of the raw video file here for your VO}
    WRITE THE REPORTER SCRIPT IN CAPITAL LETTERS.
    {SOT}
    {EDITOR NOTE:  slug/name of the raw video file here}
    <In and out time codes from raw unedited video clip in minutes and seconds like this: 00:00-00:00. First and last name, title of person interviewed “write word for word the sound from the interview here in lowercase letters.”>
    TRT: write the SOT total run time in minutes and seconds here 00:00.
    {EDITOR NOTE: include the slug/name of the raw video file here for your VO}
    WRITE THE REPORTER SCRIPT IN CAPITAL LETTERS.
    {SOT}
    {EDITOR NOTE: slug/name of the raw video file here}
    <In and out time codes from raw unedited video clip in minutes and seconds like this: 00:00-00:00. First and last name, title of person interviewed “write word for word the sound from the interview here in lowercase letters.”>
    TRT: write the SOT total run time in minutes and seconds here 00:00.
    {EDITOR NOTE:  include the slug/name of the raw video file here for your VO}
    WRITE THE REPORTER SCRIPT IN CAPITAL LETTERS.
    {END OF PKG}

    A nat PKG should be formatted this way:

    {1-3 WORD SLUG GOES HERE}
    {PKG}
    {SOT}
    {EDITOR NOTE:  slug/name of the raw video file here}
    <In and out time codes from raw unedited video clip in minutes and seconds like this: 00:00-00:00. First and last name, title of person interviewed “write word for word the sound from the interview here in lowercase letters.”>
    TRT: write the SOT total run time in minutes and seconds here 00:00.
    {SOT}
    {EDITOR NOTE: slug/name of the raw video file here}
    <In and out time codes from raw unedited video clip in minutes and seconds like this: 00:00-00:00. First and last name, title of person interviewed “write word for word the sound from the interview here in lowercase letters.”>
    TRT: write the SOT total run time in minutes and seconds here 00:00.
    {SOT}
    {EDITOR NOTE: slug/name of the raw video file here}
    <In and out time codes from raw unedited video clip in minutes and seconds like this: 00:00-00:00. First and last name, title of person interviewed “write word for word the sound from the interview here in lowercase letters.”>
    TRT: write the SOT total run time in minutes and seconds here 00:00.
    {SOT}
    {EDITOR NOTE: slug/name of the raw video file here}
    <In and out time codes from raw unedited video clip in minutes and seconds like this: 00:00-00:00. First and last name, title of person interviewed “write word for word the sound from the interview here in lowercase letters.”>
    TRT: write the SOT total run time in minutes and seconds here 00:00.
    {END OF PKG}

    Donut

    This is the anchor lead (also called a toss) to the reporter pkg. When you see the word “donut” on CNN Newssource for example, you can expect there to be a script in for your anchor toss and tag, plus the pkg script.

    enps

    There are many different donut styles. But the biggest different in regards to your script formatting is that you include an anchor toss and tag. You can have an anchor toss to a live reporter (as seen in the above rundown). That reporter would toss to his/her own pkg, then the reporter would tag their own pkg live. Occasionally there’s a question and answer interaction with the anchor. But to keep it simple when you first start you can choose to have a basic anchor toss to reporter pkg, with anchor tag.Your scripts should be single spaced. Each sentence and command should be on its own line. Here’s what that would look like in a script:

    {1-3 WORD SLUG GOES HERE}
    {1SHOT}
    {ANCHOR NAME}
    WRITE THE LEAD SCRIPT HERE IN CAPITAL LETTERS. THESE ARE USUALLY 2-3 SENTENCES. THE LAST SENTENCE WOULD TOSS TO THE REPORTER WITH THE REPORTER’S NAME AND A SPECIFIC REASON TO WATCH THEIR PKG.
    {PKG}
    {SOT}
    {EDITOR NOTE:  slug/name of the raw video file here}
    <In and out time codes from raw unedited video clip in minutes and seconds like this: 00:00-00:00 First and last name, title of person interviewed (unless it’s a nat pop) “write word for word the sound from the interview here in lowercase letters.”>
    TRT: write the SOT total run time in minutes and seconds here 00:00.
    {EDITOR NOTE:  include the slug/name of the raw video file here for your VO}
    WRITE THE REPORTER SCRIPT IN CAPITAL LETTERS.
    {SOT}
    {EDITOR NOTE:  slug/name of the raw video file here}
    <In and out time codes from raw unedited video clip in minutes and seconds like this: 00:00-00:00. First and last name, title of person interviewed “write word for word the sound from the interview here in lowercase letters.”>
    TRT: write the SOT total run time in minutes and seconds here 00:00.
    {EDITOR NOTE: include the slug/name of the raw video file here for your VO}
    WRITE THE REPORTER SCRIPT IN CAPITAL LETTERS.
    {SOT}
    {EDITOR NOTE: slug/name of the raw video file here}
    <In and out time codes from raw unedited video clip in minutes and seconds like this: 00:00-00:00. First and last name, title of person interviewed “write word for word the sound from the interview here in lowercase letters.”>
    TRT: write the SOT total run time in minutes and seconds here 00:00.
    {EDITOR NOTE:  include the slug/name of the raw video file here for your VO}
    WRITE THE REPORTER SCRIPT IN CAPITAL LETTERS.
    {END OF PKG}
    {1SHOT}
    {ANCHOR NAME}
    WRITE THE ANCHOR TAG IN CAPITAL LETTERS HERE.
    THE ANCHOR TAG SHOULD GIVE VIEWERS RESOURCES TO LEARN MORE LIKE A WEBSITE OR DATE OF FUTURE EVENT.
    THE ANCHOR TAG COULD ALSO ADD A NUGGET OF INTERESTING INFO THAT WASN’T INCLUDED IN THE PKG.

    Here’s what a donut looks like on CNN Newsource:

    cnn1

    cnn

    Watch this A-block and try to identify which story forms are used:

    Write to your video

    Your goal should always be to write to your video. This ties your words together with your visuals. Your script should match the b-roll in your final product. You should write to your video in all story forms from VO’s to PKGs. For example, if you have video of a plane crashing into the ground, it catching on fire, and the pilot getting out, then write something like:
    YOU CAN SEE THE MOMENTS THE PLANE CRASHED INTO THE GROUND.
    FLAMES BURST INTO THE AIR.
    SECONDS LATER THE PILOT CRAWLED OUT OF THE WRECKAGE.
    RESCUE CREWS TELL US HE DIDN’T HAVE A SCRATCH ON HIM.

    Instead of:
    AN INVESTIGATION IS UNDERWAY TO FIND OUT WHAT CAUSED A PLANE’S ENGINE TO FAIL.
    THE PILOT WAS THE ONLY PERSON ON BOARD.
    HE WAS UNINJURED.

    Weather stories are also great opportunities to write to video. If your video shows homes submerged in dirty flood waters, and TVs floating down what used to be the street, then write that. Instead of just writing that record rains caused widespread flooding.

    Writing to video increases the chance that your audience pays attention.

    File Video

    Sometimes you don’t have new video to write to. Perhaps the video you are referencing is old. For example, if you’re writing about a war that happened several years ago, then you would use file video. You may also use file video of an athlete for example. But make sure to write in such a way that your audience doesn’t think the video is new. Do not try to mislead your viewers with file video.

    Wallpaper Video

    Wallpaper is generic video that should be avoided. If this becomes your last option, just don’t use it. No video, no problem. For the most part, your video should be specific to maintain journalistic integrity. Wallpaper video is usually boring for viewers, but can also get you in legal trouble. If you’re doing a story on people with problems like obesity, AIDS, heart disease, etc. you may be inclined to spray video of people walking around outside. But these “generic” people are real people who don’t necessarily appreciate you unintentionally telling everyone they have weight issues or diseases.

    Quotes

    We paraphrase most of the time, but sometimes quotes are better. Use quotes when:

    • Presenting excerpts from a formal statement given by someone who is either unwilling or unable to go on-camera
    • Pulling quotes from a document used in an investigative story
    • Quoting court testimony
    • Giving text support to a hard-to-understand audio track, such as a 911 tape, undercover audio introduced as evidence in court, a phone conversation, and so forth. In such instances, we would typically use quotation marks on-screen.